Few moments feel as rewarding as a tight, freshly tuned drum. Sometimes, the urge to replace drumheads strikes just before a gig. Drummers crave speed, but they also expect their sound to stay intact.
If you’re a drummer, you know skipping steps or rushing a drumhead change rarely works out. There’s a method to swapping heads that keeps your sound dialed in and your nerves calm.
Get ready to learn time-saving approaches to replace drumheads. You’ll find checklists, stories, and real-world comparisons—each crafted to keep your kit sharp and consistent, even on the tightest schedule.
Proven Sequence for Quick Drumhead Changes
To swap drumheads fast and keep your kit in tune, follow a logical, step-by-step sequence. This minimizes variables and helps every drum maintain its signature resonance.
Try organizing tools and workspace in advance. Set your drum key, lubricant, cloth, and new heads within arm’s length. Once you start, you won’t fumble around for parts.
Visualize the Setup for Predictable Results
Before loosening a single tension rod, snap a photo or note current settings. Mark the top and bottom of the drum if needed. This step preserves your baseline tuning.
Remove only one drum at a time, keeping lugs, hoops, and washers grouped together. Organization prevents accidental mixing, which can alter tension response during reassembly.
Take a nod from pit crews: everything’s labeled and in the right spot. Following this model speeds up the process and reduces mistakes.
Technique for Even Lug Release and Seating
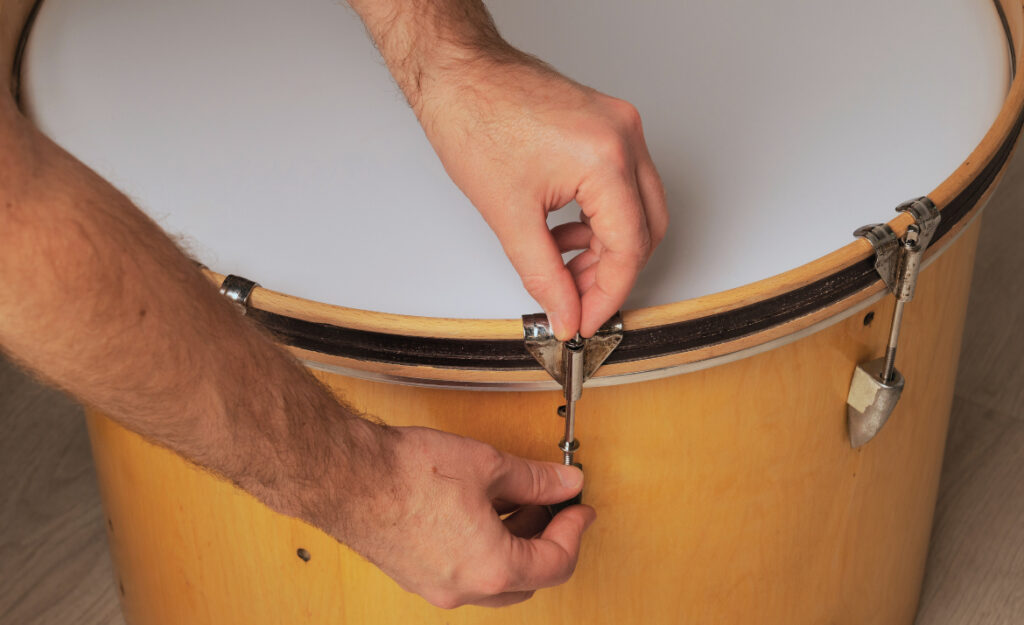
Loosen tension rods in a star pattern. Compare this to tightening a car tire—uneven movements warp surfaces. Even, incremental loosening ensures stress is distributed properly.
After removing the old head, clean away stick dust and debris with a soft, lint-free cloth. Even a thin layer of grime can affect seat and tuning stability later.
Seat the new drumhead with gentle hand pressure. Rotate the drum while applying even force. The goal: consistent contact with the bearing edge, not brute strength.
Initial Tuning: The Prime Foundation
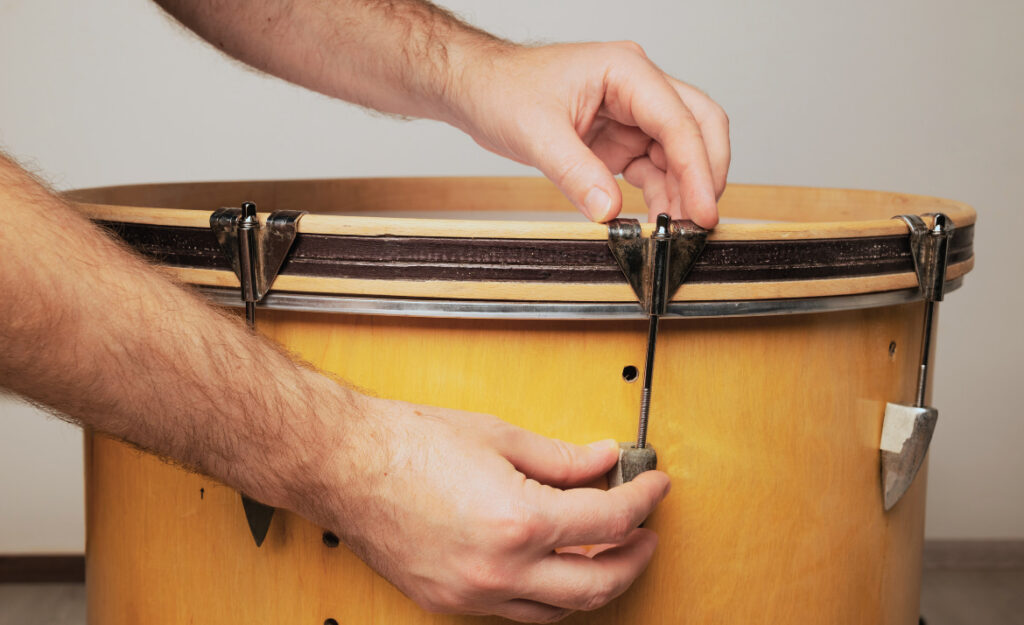
Finger-tighten each rod before introducing the drum key. This gentle approach keeps threads straight and drum hoops even—essential for consistent attack and sustain across each lug.
Crank tension most of the way up using the star pattern, then press the drumhead in the center with your palm. This helps seat the head and eliminates micro wrinkles that cause detuning.
Deliver several quarter-turns per rod in sequence, tap-tuning at each step so you can hear progress. Reference your earlier notes or photos if the pitch drifts or the drum sounds uneven.
| Step | What To Do | Why It Matters | Next |
|---|---|---|---|
| 1 | Lay out tools and new drumhead | Speeds up the entire change process | Begin removing old head |
| 2 | Photograph current tuning setup | Reference point for retuning | Disassemble lugs and hoop |
| 3 | Loosen lugs star-pattern | Prevents shell and hoop warping | Remove all rods/lugs |
| 4 | Clean bearing edge/drum | Ensures even drumhead contact | Seat and center drumhead |
| 5 | Finger-tighten all rods star-pattern | Avoids splaying/tension issues | Fine-tune evenly |
Fine-Tuning Fast: Checklists to Lock in Pitch and Tone
Solidify tuning without stress by sticking to clear checklists and shortcuts. Harness habits used by working drummers to cut minutes off the process without losing your sound.
Keep tension even. Always listen for slack or sudden drops in pitch. A checklist gives you a proven route and helps pinpoint where a lug strays off course.
Checklist: Immediate Steps After Seating the New Head
Try the following after seating any new drumhead. It’s tailored for speed and accuracy, ensuring every lug and hoop interaction supports consistent tone and feel.
- Tap-tune each quarter of the drum—listen for differences and adjust upward or downward as needed for even pitch.
- Press in the center of the head. If you hear crackling or feel movement, repeat light quarter turns around the head for stability.
- Check all rods with fingers for equal resistance. Mark any that slip or catch with chalk for targeted re-tightening.
- Spin the drum on your lap to detect even seating—the head should turn smoothly without friction or binding.
- Mark the north position of each lug with tape, so you know where your starting point is if troubleshooting is required later.
This sequence creates balanced resonance and helps lock in tonal consistency—even on a rushed schedule.
List: Five Common Detuning Pitfalls and What to Do Instead
See below for practical solutions to issues that surface after you replace drumheads. Each one offers a prevention strategy and actionable fix.
- Overtightening one lug—stop, back off, then retune in a star-pattern to redistribute tension evenly.
- Neglecting to check bearing edge—wipe clean every time to avoid debris-caused tuning drift.
- Skipping finger check—twist lugs by hand first, then use a key to prevent cross-threading.
- Forgetting seating palm press—lightly push the center, then retune for improved long-term pitch stability.
- Mixing tension rod hardware—keep rods with their original hoop positions to preserve even stretch and fit.
Quick fixes like these eliminate post-swap tuning issues and keep your rehearsal or gig on track.
Prioritizing Consistency: Keep Tune Between Sessions
To keep drums in tune gig after gig, enforce habits that make detuning unlikely. Treat each tuning like a mini-inspection and future sessions become painless.
After you replace drumheads, focus on repeatability. Aim to use the same logic and process each time so your kit feels familiar and reliable no matter the venue.
Minimize External Variables
Pay attention to room temperature, humidity, and how you store drums. These factors affect head stretch and tension, and ultimately, the drum’s pitch stability between sessions.
Keep climate stable in your drum space whenever possible. Place desiccant packs in cases, or store cases above ground level to avoid excess moisture near bearing edges.
Consider marking where the rods and lugs align after tuning. Use a fine line with a marker or thin tape to aid quick checks the next time you set up.
Routine Checks for Mid-Gig Corrections
Before soundcheck or during a break, tap around each drum with a stick and listen for pitch inconsistencies. This habit helps catch slip-ups early before they worsen on stage.
Re-tighten with a half-turn in the affected area only—don’t start loosening rods unnecessarily. Address just the trouble spots to preserve the overall drum feel.
If a drum detunes mid-set, log which lug and on which drum. Track repeated offenders over several gigs for targeted attention next time you replace drumheads.
Streamlined Swaps Under Pressure: Example from a Stage Break
Speed is essential when replacing drumheads during a band set break. Planning and muscle memory ensure the process moves quickly and the drum sound stays reliable.
Consider this real-world example: between two songs, a snare head splits. A drummer calmly signals the band, grabs the prepped replacement, and signals, “Two minutes, max.” The swap runs like clockwork.
Checklist Actions in a Pinch
The drummer quickly lays the spare on a clean towel and organizes hardware by how it came off the drum. Loose rods and hoops stay in their original positions.
With no time for a full retune, the drummer follows the core sequence: remove, clean, seat, and finger-tighten in a star-pattern. Palm-pressing and one round of tuning finish the swap.
Tension checks follow—a quick, practiced tap around the head reveals any major discrepancies. Even on a tight timeline, fundamentals make pitch issues less likely.
Automating Routine for Consistent Speed
This approach mirrors how athletes drill form into habit. By practicing swaps at home, drummers turn replacements into muscle memory, trimming seconds in high-pressure scenarios.
Keep emergency spares and tools packed in the same spot every time. Predictable placement trims valuable seconds. Memorize your checklist—no guesswork during showtime.
Familiar steps mean more confidence and calmness under scrutiny. This method brings both peace of mind and steady performance quality after you replace drumheads onstage.
Smart Hardware Choices for Efficient Drumhead Replacement
Upgrading certain hardware can shrink drumhead change time and help maintain consistent tension and tone. Smart investments pay off every time you replace drumheads in a rush.
Low-mass lugs, upgraded tension rods, or memory locks make a measurable difference. Memory locks help return tension rods or lugs to prior positions for near-instant recall of signature sounds.
Comparing Hardware Solutions
Quick-release tension rods—think wingtops or knurled rods—speed up removal and replacement. Compare this to swapping lightbulbs: an ergonomic fit saves time and prevents overtightening.
Memory locks and index rings work for both toms and snares. These create visual and physical reference points, bringing tuning consistency even after multiple head swaps.
Investing in a high-quality drum key helps keep pressure even. Some keys have torque control, ensuring you don’t overtighten or strip rods during a fast-paced replacement.
Checklist: What to Upgrade for Faster Swaps
Upgrade hardware items in this sequence for maximum impact on speed and tune consistency:
- Install quick-release tension rods first on your snare. This is the drum you’ll swap mid-gig most.
- Add memory locks to toms and snare stands. These return at the same height and tension after every change.
- Use high-torque drum keys for the most commonly swapped drums. Keep one on a carabiner or lanyard for instant access.
- Mark preferred tuning positions on rods with colored tape. This gives quick visual feedback during reassembly.
- Keep a labeled container for each drum’s tension rods and washers, ensuring nothing switches places.
Adopting just a couple of these upgrades streamlines every attempt to replace drumheads over your drumming life.
Post-Swap Checks: Capture Reliable Tone and Tension
Securing reliable tone post-swap means focusing on a series of quick checks after replacing the head. Start with tap-tuning in a star and circle pattern, listening for clear, even pitch across the entire head.
Don’t rush final tightening. If any lug feels stiffer or looser, back it off slightly, then retighten to match the others. Repeat tap-tuning as needed to lock in resonance.
Checking for Head Seating and Shell Integrity
Flex the drumhead gently with your palm and fingers. Steady, uniform feel signals proper seating. Any ‘dead’ zones indicate uneven tension or stray debris, so revisit tension and clean again if needed.
Visually inspect the drum shell and hardware after the new head is seated. Look for tiny misalignments. Correct any issues immediately to avoid longer-term problems with tone and stability.
Always finish by lightly stretching the head: press with the palm and retune as needed. Heads can seat further within a short playing session, so check tune again after a brief break or warm-up.
Monitoring Over Time: Hourly and Daily Retuning
Check-tune heads after the first hour of playing. Expect slight detuning as the head and drum adjust to pressure. Correct any lugs that have drifted, maintaining the “star” pattern for every adjustment.
Mark problematic lugs or rods so you can watch for recurring issues. After several sessions, you may need to lubricate or replace sticky or uneven rods for long-term tuning confidence.
Adopting these steps after every time you replace drumheads ensures your drums keep their character and reliability over time.
Effective Drumhead Replacement Becomes a Habit: Final Thoughts
Sticking to routines makes your drum kit easier to manage and your tone more consistent. As you repeat the process, you’ll start to spot shortcuts, personal quirks, and improvements.
Prioritizing order and consistent technique every time you replace drumheads grants both stability and peace of mind. Even five-minute swaps can sound just right with good habits in place.
Count on your drum kit to respond as expected, gig after gig. The takeaway: practice faster swaps and routine tuning checks. They elevate your drumming experience and ensure your sound is always at its best.