No drummer wants a wobbly snare or a tom that droops right as a groove hits. When you tighten drum hardware before soundcheck, you’ll play with more confidence because your gear won’t quit on you.
Whether you’re rehearsing, gigging, or recording, keeping your hardware locked down matters just as much as your drum tuning. Unsecured stands or slipping mounts break your flow and distract from music.
Jump into this guide to upgrade your routine. You’ll pick up specific steps, checklists, and pro-level reminders to help you tighten drum hardware so it stays rock-solid all set long.
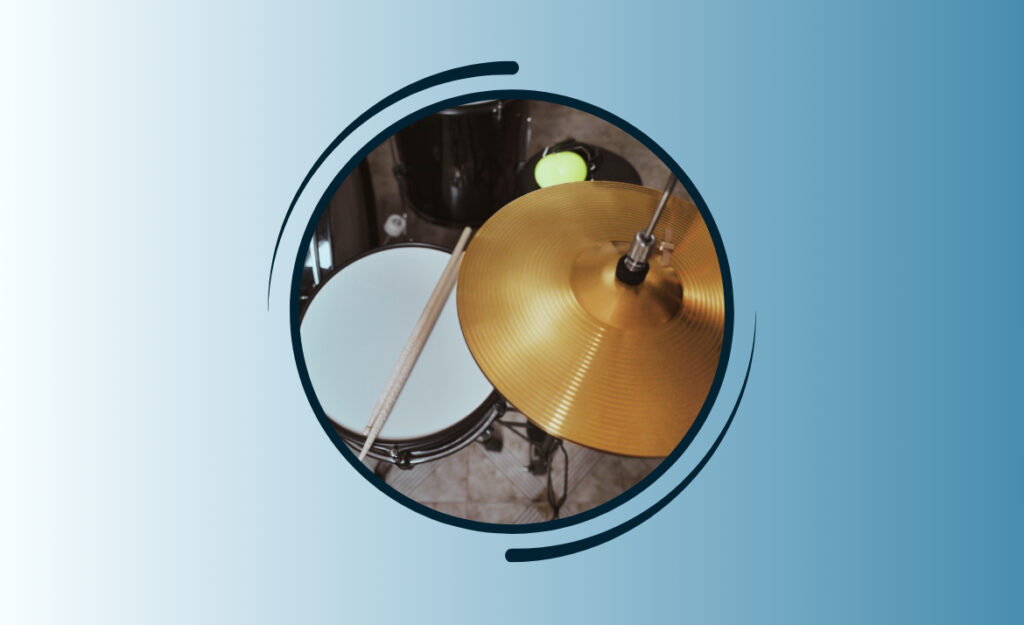
Dial in Your Gear: Visual Checks that Prevent Mid-Song Slips
Start every setup by looking over each piece of drum hardware. If you see wing nuts, memory locks, or L-rods at weird angles, address them before you play a single note.
Pay attention to hardware that moves. Hi-hat stands, snare baskets, and tom holders are common points of failure. Just catching a loose bolt or two at the start saves stress later.
Memory Locks: Reliable Repeats
Memory locks are your allies when you want perfect hardware placement every show. Secure them until you feel solid resistance, but never overtighten—this keeps your stands reliable day after day.
An example: After adjusting your cymbal stand height on the gig, tighten the memory lock, then spin the stand gently. If you can’t jostle it loose, you’re ready.
Apply this practice to tom arms and snare baskets. Consistency is possible when you commit to checking these tiny locks each setup and breakdown.
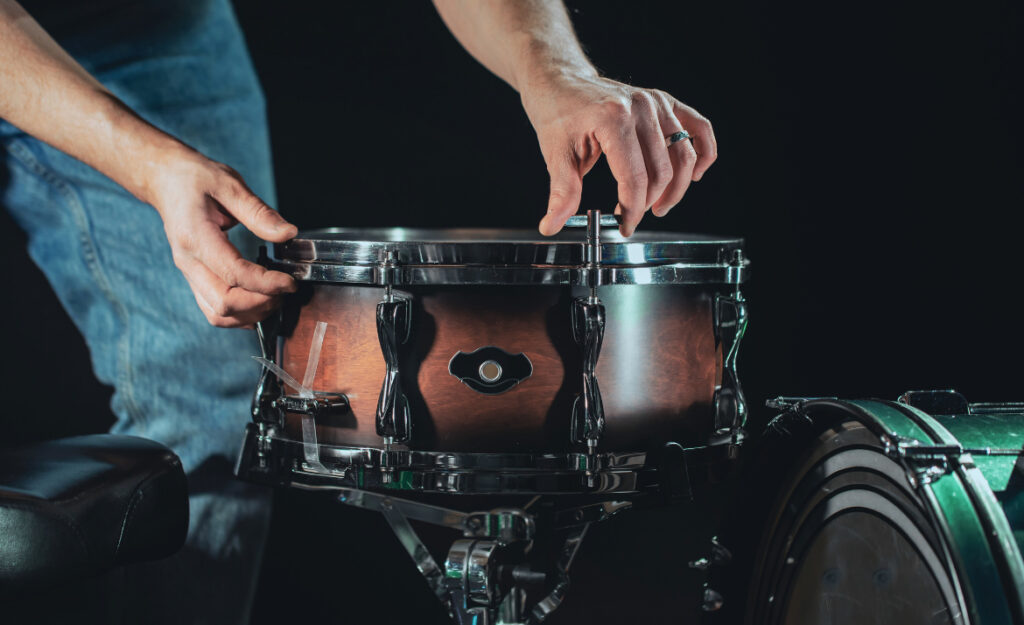
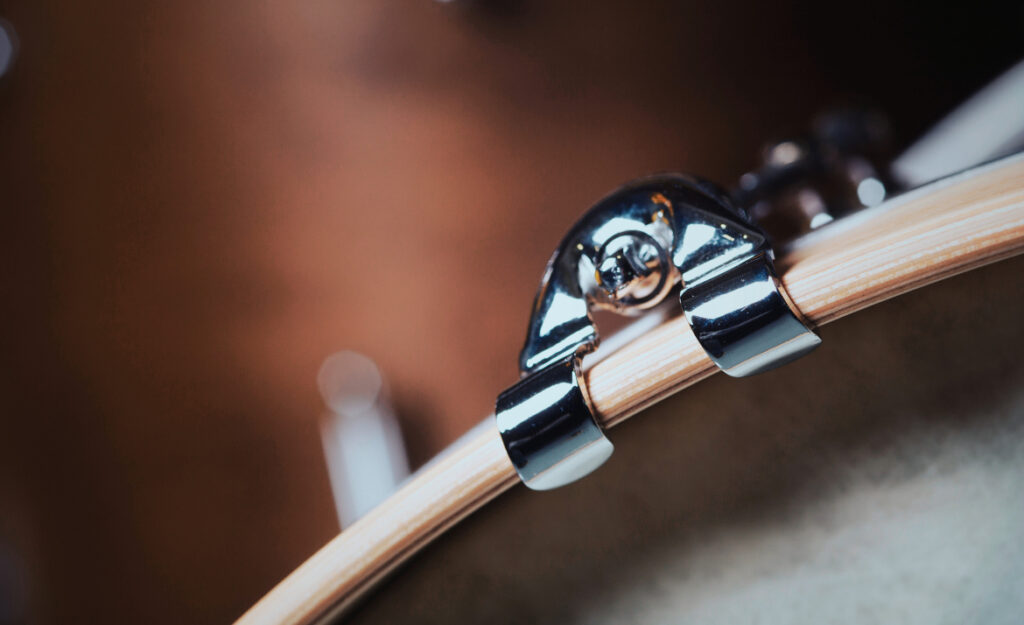
Spot-Checking Wing Nuts and Screws
Grip each wing nut between thumb and forefinger, then snug it until you feel resistance—think secure, not forced. Over-cranking can strip threads, so steady pressure is best.
For a real-world script, say, “This nut won’t budge unless someone tries,” then give it a twist check. Add it to your pre-gig checklist and your gear will stay locked in all set.
Inspect pedal adjustment screws too. If your bass drum pedal shifts even slightly, retighten or swap it for a fresh screw immediately. Slippage here saps energy fast.
| Hardware Part | Common Problem | Quick Solution | Next Step |
|---|---|---|---|
| Cymbal Stand | Slipping boom arm | Tighten tilter and memory lock | Add drum key to checklist |
| Snare Basket | Bounce/shifting snare | Check angle and tighten wing nut | Reposition before each set |
| Bass Drum Pedal | Lost placement | Secure pedal clamp and screws | Test stability by stomping |
| Tom Mounts | Drooping tom | Tighten mount bolts | Check for stripped threads |
| Hi-Hat Stand | Footboard misalignment | Lock in tension rod | Review footboard angle |
Establish a Repeatable Pre-Show Tightening Routine
Adapt a five-step habit to make tightening drum hardware second nature, so nerves and excitement never lead you to a rushed, vulnerable setup.
By sticking to a routine, you guarantee every bolt, wing nut, and memory lock stays engaged—putting fewer surprises between you and your best grooves.
Checklist for Tension and Placement
Run through these five quick checks before every rehearsal or gig.
- Tighten each cymbal stand joint—stand by the kit, flex the boom arm, and test for movement.
- Adjust each tom mount—press down on each drum, ensuring it doesn’t slip or sag.
- Spin each snare basket—find wobble, then tighten gradually until immobile.
- Rock your hi-hat pedal at different heights—secure wing nuts so the lathe stays straight.
- Push the bass drum forward—tighten pedal clamp and feet for zero slide.
Every step in this checklist brings new reliability to your performance. Write down or memorize these actions so your nerves can focus on music, not mechanical issues.
Essential Drum Key Hacks
Keep your drum key on a carabiner attached to your stick bag, and always return it after use. This saves valuable seconds when tweaks are needed mid-set.
Use a drum key to test tension on hardware bolts that don’t use wing nuts. If a part spins with minimal effort, it’s due for a quick snug.
Even analogies work here: treat the drum key like a house key—don’t leave home without it, and check you have it before packing up after a show.
Maintenance Between Sessions for Lasting Performance
After every performance, dedicate two minutes to visually inspect hardware and note anything that’s shifted. Write it down, then fix those pieces before you forget.
Avoid simply “eyeballing”—run fingers along hardware and tighten where you feel any give or looseness.
Add a five-second shake test to each rack and cymbal stand. If something rattles, tighten drum hardware there until silent. Those few seconds keep your gear gig-ready.
Create a Secure Drumming Foundation with Smart Hardware Upgrades
Boost your drum setup’s reliability by investing in sturdy, modern hardware. Well-designed components offer better grip and tighter fit than aging stands or mounts.
When shopping for new stands or mounts, choose features that minimize movement on stage and make every tightening count.
Features That Enhance Security
Options like adjustable memory locks, double-braced legs, and captive wing screws give more holding power than basic gear. Focus on products with rubberized feet for extra floor friction.
- Upgrade to stands with double-braced legs—these withstand aggressive playing by spreading weight and reducing wobble on every surface.
- Choose hardware with captive wing nuts—they won’t fall off mid-set and allow quick adjustments.
- Pick mounts with memory locks and clear marking lines—these help you re-set gear fast and consistently.
- Find stands with rubber or spiked feet—prevent stage drift with better traction, whether on carpet or hardwood.
- Select hi-hat stands with rotating legs for tight spaces—these fit more securely among pedal-heavy setups.
Every one of these upgrades makes the process to tighten drum hardware faster and more dependable. Test each in-store; ask to shake the setups before buying.
Protect Hardware with Regular Cleanings
Remove dust and grime with a microfiber cloth, then apply a bit of lubricant to moving parts where the manufacturer recommends. Clean gear latches better, tightens more securely, and lasts longer under stress.
Inspect for rust or corrosion—spots here weaken threads and make your tightened bolts unreliable. Address issues with a wire brush or replace parts when possible.
Keep your tools and spare parts in a labeled bag inside your gig case. Accessibility here helps you tighten drum hardware on short notice backstage without frantic searching.
Address Common Issues Onstage: Fast Fixes for Secure Hardware
Even with every precaution, a loosening stand or pedal can sneak up during a set. Knowing the right move saves your groove and your nerves.
Practice your response so when trouble hits, you’ll have a calm routine that stops the slip fast, not a panic that derails the music.
On-the-Fly Hardware Adjustments
During a song break, keep one hand on your drum key at all times. For a drooping tom, use the next fill break to quickly tighten drum hardware at the mount.
Don’t attempt full resets mid-song. Focus fixes on the most urgent point. If your snare stand shifts, plant your foot and twist the wing nut steady with a single confident move.
Use quick visual cues: if cymbals look drooped, adjust between phrases, then check it again at set’s end before moving on to the next venue.
Prevent Repeat Problems with Communication
After a gig, jot down any issues experienced. Tell your bandmates or tech, “Snare stand slipped twice at verse two—remind me to hit it with the key pre-set.” This habit leads to quicker resolutions.
For shared backline gear, mark hardware adjustments with gaffer tape or a wax pen so your best settings are easy to spot and restore.
Return hardware to gig bags in the same order every time. Predictable packing routines reduce hardware loss and missed tightening steps.
Upgrade Your Sound by Eliminating Hardware Rattles
Locking down hardware doesn’t just help your playing—it’s a secret weapon for cleaner, more focused drum sounds onstage and in the studio.
Small vibrations and rattling stands can bleed onto mics or recordings. Pro engineers always double-check every piece is snug before they hit record.
Packing Tape and Sound Dampening Tips
For quick fixes, keep a short roll of clear packing tape. If a mounting screw rattles, wrap a layer or two around the thread before tightening it down—just like an emergency drum head patch.
Dedicate a few minutes to check each hardware joint in your setup. Listening for rattles, tap lightly with your sticks, then tighten drum hardware that’s buzzing.
Swap out worn rubber grommets and felt washers—these insulate cymbals and arms from vibration, cutting noise at the source and tightening your overall sound.
Use Moongel and Sound Shields Thoughtfully
Strategically place Moongel or other dampeners near noisy clamps, especially in studio environments where every small vibration is audible on mics. Flatten the pad with a stick, then test to make sure it doesn’t slide.
Clip a small sound shield or barrier near rattle-prone hardware sections. This isolates the noise and gives you a focused, reliable monitoring feed in your headphones.
By regularly checking and tightening hardware, you contribute directly to a more professional, cleaner drum sound that cuts through mixes and feels satisfying to play.
Keep Confidence High: Daily Practices for Secure Setups
If you make tightening drum hardware a daily habit, you’ll never worry about hardware failure holding you back. Build this check into every rehearsal and show for peace of mind.
Start each practice or setup with a brief, methodical run-through—touch and test every point of hardware contact before locks and nuts settle into place.
- Run fingers along each stand—catch any looseness by feel, not just sight, and adjust immediately.
- Step on every pedal with extra force—simulate gig energy to spot potential shifts or wobbles.
- Document settings with photos—return to ideal positions after packing up the kit or sharing gear.
- Bring spares—pack extra wing nuts and drum keys to handle unexpected breaks or worn parts fast.
- Ask another musician to quickly tug or shake stands—a second set of hands catches mistakes before a live audience ever sees them.
With these daily actions, securing your hardware feels natural and becomes a background strength you can always rely on when playing anywhere.
Reliable Hardware: The Drummer’s Advantage
Your focus on tightening drum hardware gives a steady, high-performing setup that stands up to every rehearsal, gig, and recording session—no matter how intense the music gets.
Each step, from visual checks to sound-focused tweaks, teaches you the value of careful attention and a clear routine. Strong habits today build professional-sounding results over the long term.
Secure hardware takes one worry off your plate, allowing your hands and mind to focus entirely on expression, groove, and connection with your bandmates or audience.