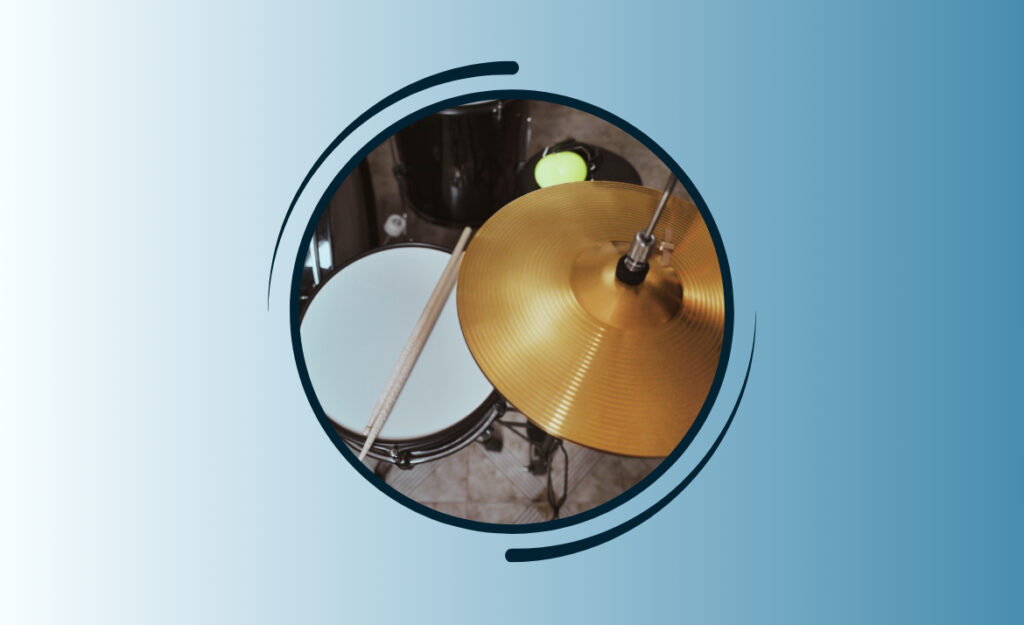
Every drummer loves the consistent bounce and feel that a fresh set of electronic pads offer, though that sensation fades well before it should without good habits. Building electronic drum care into your routine quietly extends pad life and keeps those dynamic nuances in your hands. Drummers know, with responsive pads, practice feels more rewarding and gigs feel more controlled.
Proper care isn’t just about appearance—sustained performance relies on smart upkeep. When pads lose that satisfying rebounding touch, practice motivation drops and accuracy suffers. Unfortunately, dirt and neglect are the usual culprits behind lost sensitivity and stubborn triggers.
Discover the essential steps and actionable tips in this guide, from cleaning routines to storage wisdom. Read on to learn exactly how to keep your pads as fresh as the day you unboxed them, elevating your drumming session after session.

Daily Maintenance Prevents Sticky or Unresponsive Pads
If you want drum pads that deliver crisp, nuanced strikes every day, consistent basic maintenance is your first defense. Making care part of your daily wind-down routine matters more than waiting for a problem to arise later on.
Many drummers find that a quick wipedown after playing, just as you’d towel off sweaty gym equipment, reliably keeps pads feeling responsive and extends their usable life.
Quick Cleaning: Removing Sweat and Grime Right Away
After each session, take a soft microfiber cloth and gently wipe down every pad. This motion removes lingering sweat and oils that gradually eat into silicone or mesh, preserving pad bounce.
Light circular motions lift grime without pushing it deeper into the material. If your kit sees heavy use, keep a dedicated cloth close so you can clean without delay.
For stick marks or stubborn residue, lightly dampen the cloth with a bit of water. Avoid direct sprays, as excess moisture risks triggering sensor damage or sticky spots.
Checking Pad Surfaces and Trigger Zones for Consistency
Once a week, check your pads with gentle pressure to ensure response is even across the surface. If one area feels dull or lifeless, it may need extra attention or a trigger check.
Tapping lightly with your finger (not a stick) on different zones reveals any decrease in sensitivity. Note locations where volume or bounce seems dull and address them in your next cleaning.
Inconsistent response early on signals grime build-up or trigger shift. Acting quickly prevents permanent dullness, which can only be fixed with part replacement.
| Task | Frequency | Tools Needed | Next Step If Flawed |
|---|---|---|---|
| Wipe pads | After every use | Microfiber cloth | Dampen and repeat |
| Inspect triggers | Weekly | Fingers | Recalibrate module |
| Disable module | Before major cleaning | Drum key | Remove pads safely |
| Remove stick marks | Monthly | Damp cloth | Mild soap solution |
| Test cables | Quarterly | Spare cable | Replace faulty leads |
Pad Sensitivity Survives Careful Cleaning and Proper Supplies
Choosing the right cleaning agents prevents rapid wear and protects the sensitive surfaces under every strike. Careful selection beats harsh shortcuts, since strong solvents break down pad coatings and destroy bounce.
Think of drum pads like high-end sneakers—aggressive scrubbing or bleach ruins the surface, while gentle methods keep sole grip and color like-new over countless sessions.
Go-To Cleaning Supplies for Electronic Drums
You’ll want to stock gentle cleansers, mild soap, distilled water, and a soft cloth—never abrasive pads or paper towels, which leave scratches and degrade pad feel.
- Choose non-abrasive microfiber cloths for everyday wipedowns—the fine weave lifts sweat and invisible dust without grinding residue deeper into mesh or silicone.
- Apply only distilled water for lightly dampening your cloth. Tap water and household sprays may introduce minerals, leaving spots or residue that deadens pad sensors.
- Keep a diluted solution of mild, unscented dish soap for tougher marks—never choose ammonia or alcohol-based cleaners, since those break down adhesives and pad coatings fast.
- Wipe in gentle circles, not back-and-forth streaks. Light circular cleaning lifts stubborn grime while protecting delicate surfaces and preventing physical wear from repetitive motions.
- Designate a dedicated cloth per drum pad, especially if sharing your kit, to avoid cross-contaminating sweat or dirt between surfaces and pads.
Keeping the right supplies close by speeds up your routine and prevents damage from improvising with whatever’s on hand. Organization here equals pad longevity down the road.
Storage Strategies to Preserve Pad Responsiveness
Consistent storage habits make a noticeable difference, protecting against humidity, dust, and accidental impact. A dedicated drum rug or closed room keeps pads covered and stable when not in use.
- Use a dust cover after each session, which shields sensors and pad tops from environmental grime and slows aging caused by light exposure or airborne debris.
- Position your kit away from direct sunlight and radiators, since heat warps mesh materials and weakens fasteners over time.
- Secure delicate or sensitive pads when transporting, wrapping them in soft, padded fabric or their original covers for extra insurance on the road.
- Maintain a stable temperature in your drum zone—fluctuations promote condensation and sensor corrosion, dulling response with each change.
- Label and organize cables to reduce tugging or bending, which quickly breaks connections and signals within your electronic drums’ brains.
Good storage choices become second nature—just like tuning a snare before play, slipping on a pad cover should feel automatic. This step guards your investment every day.
Stick Choices Influence Pad Feel and Long-Term Responsiveness
The sticks drummers select have a direct impact on pad life, comfort, and sensor response. Balancing weight, tip material, and grip ensures you’re not accelerating wear through tiny, avoidable habits.
Drummers sometimes treat stick choice as secondary—but for electronic drum care, the right stick is critical for protecting mesh, sensors, and your wallet from premature replacement.
Sizing and Tip Options: Finding What’s Best for Your Pads
Lighter sticks with rounded wood or nylon tips distribute contact gently, minimizing stress on sensitive mesh or silicone layers. Look for smooth finishes without splinters or chipped tips.
Heavy, sharp, or chipped sticks leave deep marks and create stress points that fracture delicate sensors beneath the pad surface, leading to tracking issues and uneven response.
Drummers who keep a dedicated set of sticks for electronic drums report fewer complaints about lost rebound or false triggering—try matching diameter and weight for your favorite acoustic sticks, but preserve one set for electronics only.
Grip Tips and Padding Adjustments
Updating or adding rubber grips to your preferred sticks lessens hand fatigue and absorbs shock, reducing force on vulnerable pad layers underneath. Sweaty hands grip better and strike less aggressively, cutting down unnecessary impact.
Consider this analogy: switching to cushioned cycling gloves transforms your grip and endurance, and does the same for stick control on long drum sessions. Invest in affordable grip tape or rubber bands to test the effect today.
Padding adjustments help even beginning drummers strike smarter and extend pad life by months, if not years—every lessened shock reduces micro-tears and deductible repair bills.
Calibrating Triggers and Sensors Keeps Every Pad “Alive”
Tuning triggers and recalibrating sensors maintain accurate translation of every nuance, making practicing on electronic drums almost as expressive as playing acoustic sets. Calibration routines aren’t just a “tech” task—they determine how closely your playing matches the output sound.
Neglecting these routines means even well-cared-for pads lose their edge, reporting inconsistent volume or lagging behind your sticks. Building them into monthly drum care pays off in every measure you play.
Stepwise Pad Calibration for Consistent Tracking
Enter your module’s settings after connecting all cables and powering on your kit. Locate trigger sensitivity and threshold menus, and tap each pad gently to confirm loudness matches effort.
Adjust one pad at a time, raising sensitivity for lighter touches or lowering if you hear double triggers. Run this check after moving, swapping, or cleaning major kit parts.
As an example: if your snare triggers loudly from rim shots but quietly from ghost notes, carefully raise the rim sensitivity and lower the head, testing each change for natural feel.
Identifying and Resolving False Triggers
Unwanted hits or “ghost notes” signal over-sensitive triggers, loosely fastened pads, or dusty sensor zones. Scan for loose screws, tighten each mount, then recalibrate trigger settings for a balanced response curve.
Dust or grime between pad layers can trip sensors. Gently disconnect and lift the pad, checking for particles to remove with a blower. Never spray compressed air directly at electronics—blow lightly from the edges.
Calibrate again after cleaning or tightening—each tweak brings pad feel back to life and prevents frustrating surprises during recording or live sets.
Pad Placement and Ergonomics Support Consistent Sensitivity
Thoughtful pad setup ensures drummers strike cleanly, promoting lasting pad health and reducing uneven wear or damage. Mimic your acoustic setup’s heights and angles for comfort, while giving electronics their own ergonomic advantages.
A pad that’s too high or far away becomes a magnet for mis-hits—double check angles and spacing every few months, especially after transporting or rearranging your kit.

“Set-and-Save” Placement for Long-Term Consistency
Measure pad heights from the floor, matching your natural hand path. Use a tape measure the first time, recording each preferred height in a notebook or your phone for reference after moves.
Pads should either mirror your acoustic kit or follow a logical arc that matches your comfort zone. Misaligned pads encourage excessive force or awkward angles, boosting the risk of missed notes and dented sensors.
Documenting set positions helps save time and injury risk on electronic drum care—no guessing on gig night when your pads “feel wrong.”
Cable Management for Reliable Connectivity
Properly routed and secured cables prevent signal loss, intermittent triggers, or accidental plug dislodging. Gather cables in loose bundles with velcro ties, avoiding tight bends or pinch points at all costs.
Leave a slight loop near each input jack so that pad movement or accidental pulls don’t pull the whole cable loose. This protects fragile internal wires from snapping under stress.
Arrange your kit to avoid foot traffic near cable lines, and schedule a quick cable check during each maintenance session—catching a frayed lead early can prevent troubleshooting headaches and pad failures.
Conclusion: Daily Habits Stack Up to Responsive, Reliable Pads
Small habits—quick wipedowns, smart storage, careful stick choices, and regular calibration—create electronic drum care routines that add months (or years) to your pads’ prime.
Responsive drum pads mean every practice or performance feels fresh, letting your technique and creativity shine without technical snags stealing your momentum or flow.
Adopting these strategies doesn’t require much time or expertise—just a bit of attention each session. Build them into your musical habits, and your pads will reward you with lasting, lively response.