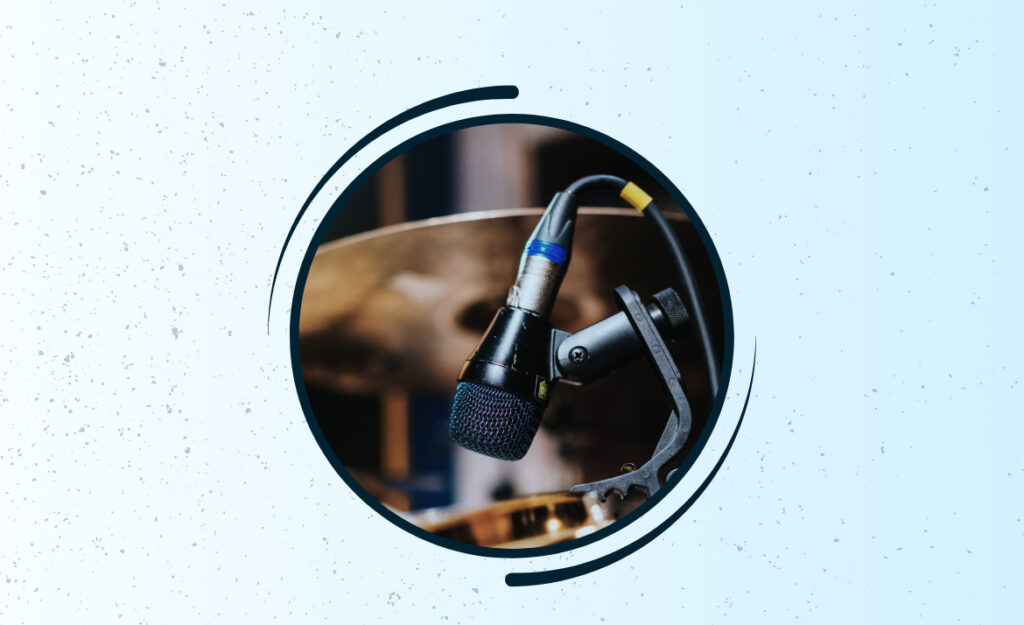
Setting up a killer drum sound on stage isn’t just about expensive gear. Even something as basic as drum mic placement can make the difference between a muddy mix and a set that rocks the room.
Live sound engineers juggle unique challenges: spill from guitar amps, unpredictable drummers, and the pressure to deliver clarity from the kick to the cymbals. All of this centers on strategic mic placement.
Get ready to dig into hands-on rules, troubleshooting tricks, and creative positioning options. Whether you already engineer shows or just want your band’s next gig to sound way tighter, this guide covers the essentials.
Pinpointing the Kick: Reliable Approaches for Consistent Low-End
Your kick sound anchors the entire kit. Smart drum mic placement for the kick means you can lock in punch and power at any venue, every single time you mix live.
Adjusting the mic angle even slightly can shift your low-end from boomy to tight. Start by demoing these rules side by side, paying close attention to crowd energy and monitor clarity.
Rule-Based Kick Mic Positioning
Set the mic halfway into the drum, angled toward the beater’s impact spot. This captures the click and definition while controlling room boom. Use a dynamic mic with tailored EQ, like an Audix D6 or Shure Beta 52A.
If you’re after sub-bass, place the mic just inside the hole, not deep inside the shell. This boosts low frequencies without sacrificing attack. Tell your band “Step back if you feel ‘mud’ in the monitors.”
Try a second mic outside the resonant head for a rounder body. Listen for phasing with both mics soloed; flip polarity if you hear the bottom drop out when both are up.
Troubleshooting: From Boom to Punch
If the kick has too much boom, gradually slide the mic back toward the drum’s opening and lower the gain. If it gets too clicky, nudge it further inside. Think: dialing in a camera’s zoom for different snapshots.
Tape a business card where the beater lands, then aim the mic toward it. You’ll get repeatable placement and a reference point. If soundcheck gets chaotic, tell the drummer “Leave the card on during setup.”
Always walk in front of the PA. If you sense thumping in your chest, roll off sub-bass around 40 Hz and notch mid-lows by 3–5 dB to avoid muddiness that clouds the entire mix.
| Placement Style | Resulting Sound | Mic Choices | Next Step |
|---|---|---|---|
| Inside Shell, On Axis | Maximum attack, tight low-end | Beta 52A, D6 | Increase angle for more definition |
| Inside Shell, Off Axis | Softer attack, focused tone | RE20 | Bump EQ at 4 kHz |
| Port Hole, Close | Big sub, subtle click | SM7B, M88 | Add attack mic for cut |
| Outside Resonant | Round, natural | Fet47, D112 | Blend with inside mic |
| Two Mics (in/out) | Full-bodied, customizable | Mix of above | Align polarity, time align |
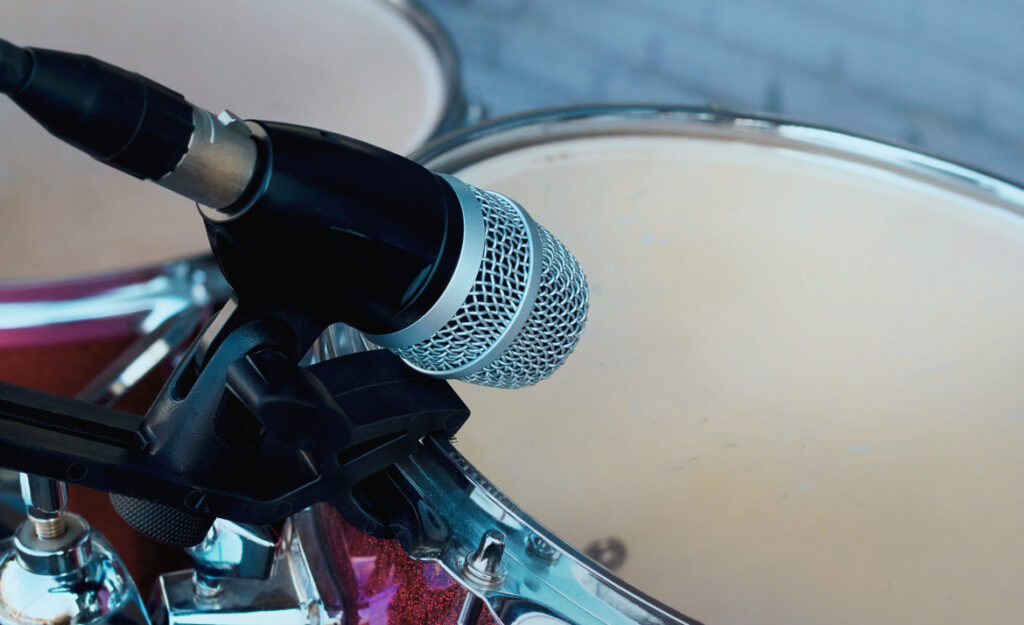
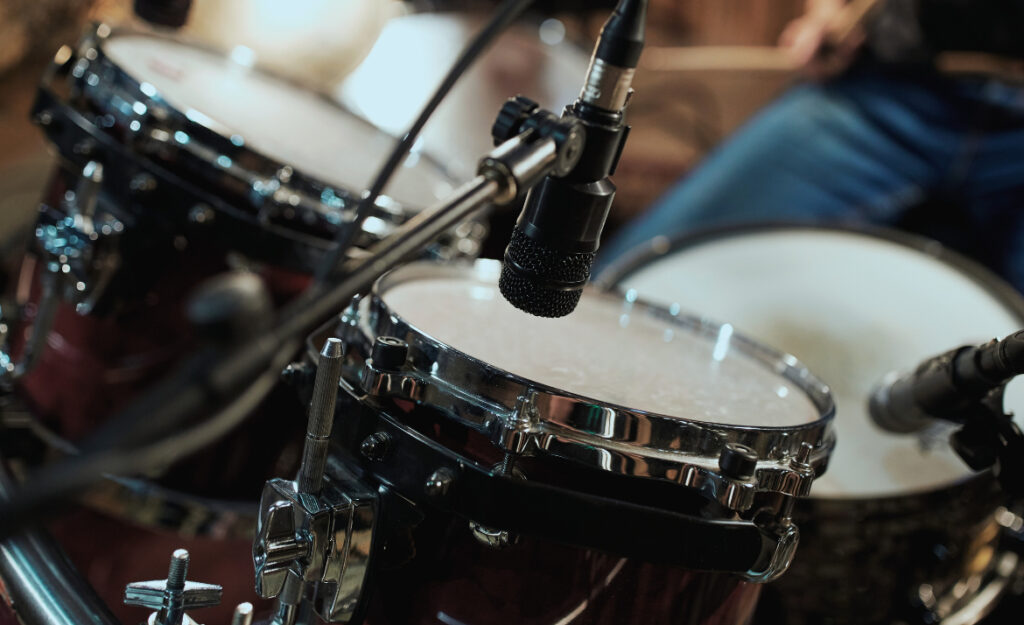
Snare Top or Side: Selecting the Right Position for Fatness and Snap
When you place the snare mic just right, you pull both body and snap into the mix. Aim for repeatability—position counts far more than the mic alone for snare character.
A tight placement one to three inches above the drum, angled toward the center, creates vibrant, punchy tone. Use dynamic mics like the SM57 since they reject cymbal bleed well.
Snare Placement Checklist
Below are actionable steps for solid snare sound:
- Aim the mic two finger-widths above rim toward the center. Captures balanced crack and depth. Avoid pointing straight down, which emphasizes ring.
- Angle slightly from side if the hi-hat is too loud. This reduces hat spill while still letting the snare cut through.
- Watch for phasing with the bottom mic. Flip reverse polarity if snare loses body when both mics are on.
- Use a heavier mic clip and moon gel on the head for stability in rowdy club shows. Keeps your setup repeatable.
- Tell the drummer: “If you tape your set list near the snare, check they don’t block the mic during fills.”
Listen at the console during soundcheck, not just with headphones. If you need more stick attack, bump 3-5 kHz slightly. Too raw? Try moving the mic half an inch outward.
Side Mount or Top? Navigating Tight Stages
Side-positioned mics, angled upward from below the rim, are a lifesaver on cramped stages where drummers move a lot. This still nets punch if you target the shell center.
- Move the stand out of tom fill paths; ask the drummer for a practice tap before the set. You’ll spot potential knock-overs early.
- Swap to shorter boom arms in festivals to avoid tangled cables and mosh pit mishaps. Tidy cabling means fewer headaches during set changes.
- If you notice missed hits or weird ringing, tap the drum yourself during check: “Does the mic see the stick every time I hit?” Tune accordingly.
- If hats spill into the snare mic, angle the cardioid pattern tighter to enclose just the snare surface. Demo this on shouty rock sets versus quieter jazz gigs.
- Advise: “If your snare buzzes a lot, let’s try moongel plus a side mic for rounder tone and less hardware rumble.”
There’s no universal snare placement. Prioritize clarity and consistency for your band’s genre and stage setup, using these approaches to build a signature snare sound.
Dialing in Overheads: Clarity and Cymbal Balance in Live Mixes
Precise drum mic placement in overheads can clarify cymbals without making toms disappear. Always aim for a balance that leaves room for vocals and guitars to shine.
Try the spaced pair method: set two condensers above the kit, each directed at the snare and floor tom bolts, about three feet up. This technique widens the image without harshness.
The “Drummer’s Ear” Angle Explained
Overhead positioning shapes what the audience hears out front. Place both overhead mics a drumstick’s length from the snare. Angle toward the drummer’s ears, not straight down, for reference-like realism.
Ask the engineer: “Do you want the ride louder in the right overhead?” Adjust height and angle by ear, keeping an eye on the stage monitor spill. Blend overheads low to avoid cymbal wash in tiny clubs.
Try Glyn Johns’ triangle with one mic over the snare and one beside the floor tom. It tightens up the stereo spread while minimizing bleed, ideal for vintage-style rock and Americana acts.
Panning, EQ, and Polarity in Practice
Pan overheads hard left and right for a wide image, but check for phase issues. Solo both with the snare and adjust if cymbals sound hollow. Flip polarity on one, if needed, to maximize fullness.
Ease up on high-end EQ boosts. Too much can make cymbals shrill out front. Use your phone to record a snippet from crowd perspective—does the kit sound balanced when you play it back?
If overheads pick up too much kick or snare, lower them by an inch or swap in hypercardioid capsules. This strategy isolates cymbals for crisp, intelligible drum mixes even in noisy rooms.
Tom Mics: Avoiding Bleed While Nailing Body and Attack
Mic the toms with a three-finger gap above the drumhead, angled 45 degrees toward the drum’s center. This emphasizes attack, producing punchy toms fit for any genre and avoiding cymbal bleed.
Use a short boom and compact dynamic mic. If drums are tightly packed, mount the clips on the drum rim to save space. Keep cables short to prevent snagging when musicians move.
Two-Mic vs. Multi-Mic Scenarios
If possible, use one mic between two rack toms. Aim for halfway between them and tweak EQ to highlight whichever drum is featured more by the performer. Blend for subtle tom fills in sparse arrangements.
When using three or more mics, solo each during check and listen for phasing in headphones. Slide them by a few millimeters and recheck; even small moves can resolve thin or hollow sound.
Compare each tom mic soloed with the overheads to detect “woof” or boxiness. Dip 250 Hz by a couple of dB as needed. Place strips of gaffer tape on the heads for cleaner notes without killing sustain.
Tom Mic Options and Uses
| Mic Model | Placement Angle | Sound Profile | Ideal Situation |
|---|---|---|---|
| SM57 | 45 degrees | Barky, pronounced midrange | Live rock sets |
| e604 | Downward, close | Compact, low bleed | Tight stage spacing |
| MD421 | Off shell | Full body, clear attack | Jazz/fusion |
| D2/D4 | Angled from rim | Punchy, modern pop | Singer-songwriter gigs |
| Beta 98AMP | Clip-on, top head | Crisp, focused | Festivals, quick changes |
Room Mics and Spot Mics: Extending Drum Presence on Stage
Strategic drum mic placement for room mics can extend your kit’s impact, especially in larger halls. Set omni or wide cardioid mics fifteen feet ahead, aimed chest-high for a natural blend.
Keep stage wash in mind: if guitar amps or crowd noise swamp the room mics, reposition or lower the gain until you hear mostly drums and minimal band noise. Always adjust before the show, not mid-set.
Gauging Room Size and Audience Proximity
If the venue feels cavernous, cut the room mic level by 6 dB. In tighter bars or clubs, try leaving them out entirely to avoid muddiness or feedback that could jar the audience.
Ask the engineer to solo room mics with overheads. If the drums vanish into reverb, move the mics closer or block direct line-of-sight to crowd noise sources on stage. Use short stands, not tall boom arms.
Spot mics for specific sounds, like tambourine or auxiliary percussion, need careful isolation. Place them a palm’s width away from the source, angled off-axis to minimize bleed. Check their levels during a mock breakdown section with the band.
Troubleshooting Typical Live Drums Mic Scenarios
Solving common issues is a key skill in drum mic placement for live sound. Quick fixes rule during fast-paced changeovers between bands and tight festival schedules.
If tom mics droop during the set, double-check thumb screws and tighten them until snug. Always bring spares in case a clip breaks or stand fails halfway through a set.
Checklist: Quick Fixes for Common Problems
- If cymbals wash over tom mics, angle the mic toward the drumhead and use foam windscreens to soften sibilance.
- For hi-hat bleed, use hypercardioid patterns and angle away from the hat edge. If needed, raise the snare mic slightly for better focus.
- To resolve phase issues, solo pairs of mics and flip polarity on one channel until the sound fills out. Use a phone app as a quick phase checker.
- Drummers who lean into the kit during fills can knock mics loose. Place gaffer tape on stands and instruct: “No adjustments without warning staff.”
- Keep spare XLRs and clips at the side of the stage—hardware snags happen, and quick swaps honor everyone’s time.
Swap or Add Mics with Zero Downtime
If a snare mic stops working mid-set, have the backup ready on a second stand. Switch cables quickly; let the band know you’re swapping as soon as they finish a song. Practice at home to get swaps under thirty seconds.
Adding a spot mic for a special solo? Pre-label your snake and color-code inputs for each drum. Say aloud: “Aux spot, input 5,” and mark the fader. This habit saves seconds and prevents confusion in festival environments.
After every set, walk onstage during breakdown and reset all mic positions before the next band. Document quick adjustments on a phone or notebook for consistency show to show.
Conclusion: Efficient Drum Mic Placement Maximizes Live Sound Impact
Consistent drum mic placement transforms a challenging stage into a sonic asset. Focusing on repeatable positions, clear communication, and awareness of changing room acoustics sets you up for pro results.
Intentional adjustments—from kick angle to snare distance—add clarity and power to every drum. With these reliable techniques, you’ll help every beat translate, no matter the genre or venue size.
The right drum mic placement isn’t just technical—it’s musical. Trust these actionable steps at your next soundcheck, and watch your mixes, and the crowd, respond immediately.