
Few feelings compare to hearing every nuance of your drum solo ring out, each hit rich and the performance captured in full detail. When recording drum solos, the sound as it comes off the kit can feel explosive, but so many players feel disappointed listening back.
Every crack of the snare, splash of the cymbal, and thump of the kick matters. Getting both clarity and punch means translating your energy into a mix that lands with power and freshness—without sounding muddy or dull.
This guide will give you every practical strategy, checklist, and example you need, whether you’re tracking in your basement or a top-tier studio. Let’s go step-by-step and make your next recording session your best yet.
Dialing in Room Acoustics Before Hitting Record
Making your drum solos stand out starts before moving a single mic. Assessing your room’s sound saves frustration later and forms the backbone of a clean, vibrant recording.
Walk around the room, clapping and listening for echoes or ringing. That’s where flutter echoes or poorly balanced reflections lurk—and where treatment changes everything.
Using Everyday Items for Acoustic Control
Blankets, pillows, and heavy curtains help soften harsh reflections when recording drum solos. Drape a thick blanket behind the kit or set up DIY gobos to stop slapback echo. It’s a quick fix, but remarkably effective for home recording.
If you play in a small, concrete-walled space, stack couch cushions at first-reflection points where sound bounces off walls back to your ears or mics. Even a few well-placed surfaces can tighten your overall drum sound.
Experiment by recording short drum bursts before and after making changes. If the kit sounds less boomy and more focused, you’re on the right path. Keep small tweaks until your drum sound really shines.
Troubleshooting Common Acoustic Issues
Metal garage doors and tile floors increase harshness fast. If possible, cover floors with thick rugs and hang moving blankets where the sound feels harshest. Record a test measure to compare the before and after so you know what helped most.
Watch for low-frequency resonance, which can cause bass drum or toms to ring too long. Placing a rolled blanket against corners or setting heavy furniture in trouble spots can lend instant dryness to the mix.
If high-pitched ringing lingers after cymbal hits, adjust curtain or blanket positions along windows or hard walls. Tweak positions between takes for noticeable differences.
Room Setup: Small Moves for Big Improvement
| Room Element | Common Issue | Quick Fix | Takeaway Instruction |
|---|---|---|---|
| Concrete walls | Harsh, snappy reflections | Hang heavy blankets or install foam panels | Cover at least 30% of untreated surfaces for clear sound |
| Wood floors | Boomy low end | Lay down a thick area rug | Build rug “islands” under kit and near mics |
| Windows/glass | Sharp resonance and flutter | Close curtains or use bubble wrap sheets | Muffle hard surfaces directly facing the kit |
| Ceiling height | Cymbals and snare sound thin | Hang clouds or baffles overhead | Install DIY panels if ceiling is under 8 ft |
| Unusual corners | Bass build-up and muddiness | Place bass traps or roll towels in corners | Target corners behind kit for instant improvement |
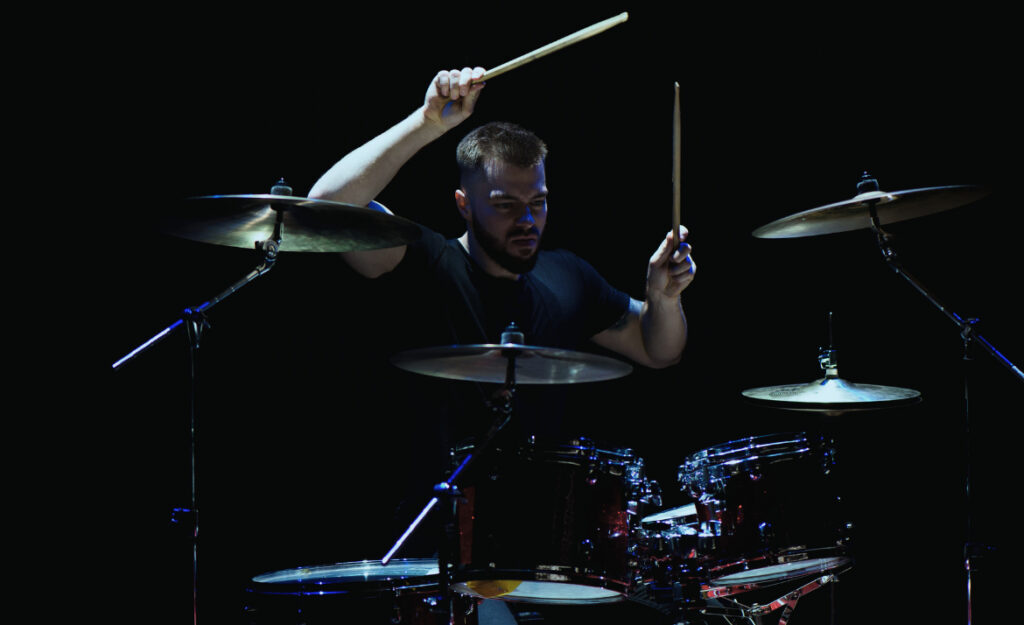
Choosing and Placing Microphones Strategically
Purposeful mic choices and careful placement carve the signature tone of any drum solo. Begin with microphones you trust, then use positioning to reveal the true voice of your kit.
If you want your solo to feel immediate and lively, keep all mic options on the table and adjust placement until each drum speaks distinctly, never fighting the others for space.
Close-Miking the Core Elements
Place a dynamic mic on the snare, aiming at the center from a finger’s distance above the head. For kick, use a purpose-built drum mic just inside the port for direct attack and minimal bleed.
Position tom mics about one to two inches from the rim, pointing toward the middle. Keeping the mics off-axis from cymbals limits unwanted wash and brings out tom definition during fills and runs.
Minimal movement—just a half-inch—changes recorded tone. Have a friend move the snare mic slightly while you play rimshots, then record and listen back to pick your favorite spot.
- Place overhead mics in an X/Y or spaced pair above the kit to capture stereo image and cymbal interaction. Adjust until the snare is centered in the stereo field for a balanced mix.
- Angle room mics away from walls to avoid harsh early reflections. Always monitor these mics when recording drum solos to ensure they add space without muddying the attack.
- Check phase by flipping the phase switch on one channel and listening for punchiness. If the mix thins, adjust mic distance until elements lock in together.
- Take the time to label each mic cable and input. This keeps confusion at bay when adjusting levels or re-recording sections under time pressure.
- Set up a quick soundcheck routine—play the loudest fill you expect, watch input meters, and lower preamp gain as needed to avoid digital clipping.
Check every mic in isolation and together, moving stepwise toward a cohesive, realistic drum sound. Take notes each time you tweak positions.
Building a Three-Mic Setup for Maximum Impact
Place a large-diaphragm condenser overhead, along with a dynamic on snare and a boundary mic in or just outside the kick drum. This classic trio covers a lot of ground for recording drum solos while keeping setup manageable.
Space the overhead two to three feet above the kit, angled to minimize cymbal harshness. A boundary mic on the floor near the kick adds weight and blends room character for punchier attacks.
When reviewing takes, solo each mic and check for clarity. If necessary, adjust mic angles versus distances to refine the attack and resonance mix for your best solo sound.
Capturing Dynamics: Translating Energy Without Losing Detail
Getting drum solos to hit with authority starts by matching mic technique to your dynamics from quiet ghost notes to thunderous accents. Record several types of playing—quiet, medium, and as loud as you intend—before committing.
Listen back and look for details lost on gentle notes or distortion on loud peaks. The best takes show all notes present but the drum sound never strains or distorts at the loudest moments.
Sequence for Level-Balanced Solos
Start your first pass with a fill using all major drums and cymbals, keeping your volume at 60 percent effort to gauge balance. Increase intensity with the next pass for punch, but don’t aim for peak volume just yet.
Edit together the sections where energy and clarity match the song’s feel best. If a section sounds muddy or disappears, re-track focusing on even stick velocity across your hands for that phrase.
Organize the final solo arranging loudest sections at moments of peak excitement to avoid listener fatigue and spotlight your skillful touch.
- Play softly then loudly for each drum before recording: This surfaces volume spikes or dead spots you might need to fix with mic movement or head adjustment.
- Record a phrase with ghost notes—light snare taps—then check if microphones are sensitive enough to capture these essential articulations for expressive solos.
- Spot-check with headphones in real time so nothing critical gets missed during tracking. Use soft earplugs to keep levels safe if you monitor live takes repeatedly.
- Tweak high-tom tuning higher or lower if ghost notes blur. Each tuning change affects mic response and clarity, especially for busy, intricate fills.
- Review your dynamic range visually on your DAW waveform. The cleanest, most energetic take usually has clear transients that never flatten into blocks.
Controlling Bleed and Keeping Articulation Crisp
Place rolled towels on unused drums to dampen sympathetic ringing, which preserves clarity during aggressive soloing. Solo each mic channel after recording and reduce ring with tape if unwanted resonance persists.
Lower the hi-hat stand or swap for a lighter pair to make intricate stick work stand out. Cymbal positioning, angled slightly away from snare and tom mics, cuts bleed and highlights punch.
Always check stick clicks and accents by listening at low volume through your monitors. Articulation pops out more clearly at softer playback levels.
Fine-Tuning Drum Tuning and Head Choices for the Studio
Tuning and drumhead choice define the core tone of your solo. Even subtle changes appear dramatically in a recording, especially as each mic captures nuance and resonance at close range.
Sweet spots for soloing are clear, defined notes—never flabby heads or buzzing wires. Always tune before each track, as humidity and stick marks can shift pitch while you record drum solos.
Snares That Snap: High-Tension Wires and Coated Heads
Tighten the batter head and snare-side wires so rimshots cut through. A coated head adds warmth and some controlled overtones, perfect for recordings that need both bite and body in the main solo passages.
If notes seem to vanish during fast stick work, slightly loosen the bottom head. For classic depth, choose a single-ply head and tune medium-high, then lightly dampen with a gel or wallet for staying power.
Swap snare wires or try a thinner reso head to further tweak articulation. Record a sixteenth-note pattern and pick the take with the clearest note definition between mics.
- Swap batter heads regularly and reseat them after heavy playing to keep resonance from fading.
- Avoid overtightening toms—go finger-tight plus a quarter turn each lug for full, punchy tone in recordings.
- Use moon gel or low-tack tape for on-the-fly dampening when bleed from other drums creeps up in practice takes.
- Drum dial tuning can speed up the process if moving quickly between setups or takes is essential for workflow.
- Incidentally, listen to top session drummers and compare your solo’s tone; match energy with clarity by revisiting head choices.
Bass Drum Power: Pillow Placement and Ported Heads
Insert a firm pillow or rolled towel halfway inside the kick for instant attack and fewer overtones. Inserting more pillow decreases the ring but risks dulling the initial punch—listen for the balance that fits your style.
Use a ported front head or cut your port for mic access if recording drum solos where modern punch or dense footwork stand out. Adjust pillow distance by inches to find where the attack feels punchiest.
Try a coated batter for vintage warmth or a double-ply for modern force. Play consistent heel-up and heel-down grooves, then check for balance between the batter and resonant heads.
Mixing for Clarity: Level Tricks and Creative Use of EQ
Mix decisions either reveal your artistry or obscure it. Push clarity forward by starting with the loudest peak of your solo, setting fader levels so every note lands with punch, not harshness.
Use subtractive EQ on each drum—cut rather than boost first—to carve space for every element. Sweep gently between 200–400Hz to remove muddiness, and dip narrow bands around 4–6kHz to reduce harsh cymbal attack if it jumps out.
Mini Mixing Checklist for Every Drum Solo Track
- Solo each drum track and check for unwanted rumble during quiet ghost notes. Use a high-pass filter between 40–60Hz for toms and snare clarity before mixing the full kit.
- Apply a gentle compression (2:1 ratio) on the snare for uniform energy. Adjust attack so transients pop, but the sustain feels even. For double-stroke rolls, set a longer release.
- Pan toms slightly left and right matching stage setup so fills and runs feel lifelike to the listener. Keep critical solo notes centered for focus.
- Bounce out a rough mix and trade notes with a trusted drummer friend. Pay attention to articulation, energy flow, and whether fast sticking patterns stay audible in the mix.
- Create an alternate mix with overheads louder for extra stereo width. Compare with the dry version; pick the one that keeps your playing present and intentional.
Finalize with a limiter on your master output—set just below digital zero—so peaks never distort and the solo sounds punchy from speaker to speaker.
Using Effects and Room Mics to Shape the Drum Solo’s Personality
Effects shouldn’t bury your performance—use them as highlights, not camouflage. Add a short, bright plate reverb to snare or toms, dialing in just enough tail to enhance natural decay without overwhelming attack.
If your mix feels dry, carefully blend in a well-placed room mic (or use a stereo room reverb) to add space and realism. Always solo the difference: with and without the effect, to keep perspective.

Building a Three-Zone Ambience for Wide Drum Solos
Set up room mics farther back to capture kit reflections, close mics on the snare and kick for definition, and an overhead for cymbal sheen. Balance these zones in the mix for a three-dimensional solo that feels both up-front and atmospheric.
Try a slapback delay (50–80 ms) on the snare in dense passages. This accentuates busy runs and makes complex fills sit forward, especially in headphone monitors.
When tracking, record one take with effects printing direct, another completely dry. Revisit both later—sometimes the energy of a committed effect inspires smarter musical phrasing during solos.
Getting Consistency: Pre-Session Rituals for Peak Drum Solos
Prepared drummers capture the clearest, punchiest recordings by forming habits. Always warm up hands, check head tuning, and tap each mic before the first take. This ritual preserves focus and confidence.
Keep a checklist taped by your kit or DAW: tuning, cables, gain staging, monitor volume, and last-minute mic adjustments. Checking these points lets you concentrate fully on creative flow when recording drum solos.
- Do finger, wrist, and stretch routines for five minutes before playing loudly—relaxed muscles control dynamics much better on record.
- Reroute all cables away from pedals and sticks to avoid bumps that cause low-level thumps in the microphones.
- Double-check mic distances and positions by snapping fingers near drums and listening back—this reveals untightened stands or minor phase problems instantly.
- Run a short, high-energy fill and watch input meters for any red peaks; lower gain, then increase monitor volume for proper listening balance.
- Keep water and a hand towel nearby. Wipe sweat, stay hydrated, and prevent finger slips that ruin otherwise sharp, clean solo tracks.
Alternating Solo Patterns in Pre-Take Run-Throughs
Alternate 4-bar phrases of loud fills with softer groove segments. Listen back for changes in articulation, making note of where quieter notes lag or get lost.
Record just the outro phrase—sometimes this is where energy is highest and mistakes creep in. Fix articulation and phrasing here for smoother, professional-sounding endings every time.
Cut and loop any tough section until every note is balanced and punchy. Practice this mini-session technique regularly—your next full solo will sound clearer and tighter by default.