
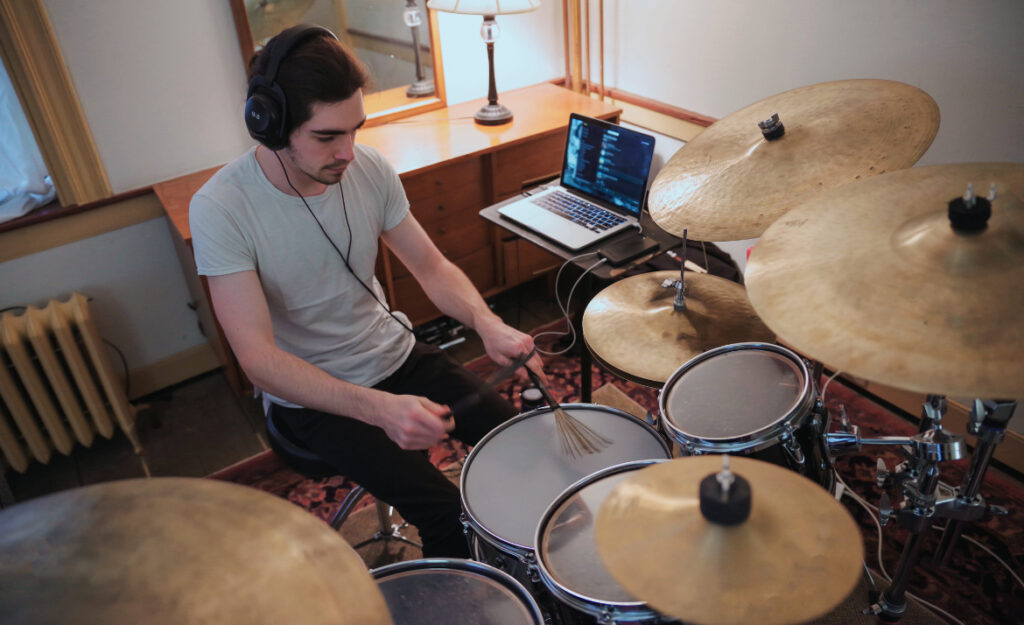
Stepping into home studio drumming can feel like chasing a moving target. You tweak for hours, but each recording session brings a new challenge. Drum recording techniques play a big role in guiding your results, giving you a clear path toward better drum sounds.
Turning a bedroom or garage into a functional drum recording space means balancing creativity with practicality. Even with budget gear, small changes in mic placement or tuning can completely re-shape your drum tone—or lead to frustrating headaches during mixing.
This guide breaks down the process into focused, achievable steps. Let’s dive into home studio drum recording techniques that actually work. Whether it’s your first session or your fiftieth, you’ll find usable tips to improve your next drum recording.
Building a Practical Home Drum Recording Setup Pays Off Instantly
Choosing equipment that fits your space and workflow puts you ahead from day one. Spending time to physically arrange your kit and recording gear translates directly into smoother sessions and consistent drum capture.
Start with what you have, then upgrade selectively. Many iconic drum tracks were recorded with minimal, well-placed gear. Focus on the essentials and learn their strengths before expanding your setup.
Positioning the Kit for Sound and Comfort
Move your drum kit away from hard walls and corners. Try speaking or clapping where you plan to set up; if the room rings harshly or feels boxy, add rugs or soft furniture to break up sound reflections. Small adjustments matter.
Set your drum throne where you can easily reach your microphone stands and audio interface. When everything is comfortable for long periods, you’ll make better takes and have energy for problem-solving late in the session.
Mark your preferred kit placement with tape on the floor. This way, even if you need to move things for daily living, you can reset quickly for the next session without guessing or losing time to unnecessary setup changes.
Choosing Microphones and Basic Audio Interfaces
Dynamic microphones (like the recognizable SM57) work well on the snare and even overheads if you only have two mics. Condenser microphones capture more detail but may also pick up more unwanted noise or room reflections in untreated spaces.
If using only two mics, try the “Recorderman” or “Glyn Johns” drum recording techniques. Place one mic directly above the snare, and another just beside your floor tom. Measure the distance from each mic to the snare to match levels and timing.
Entry-level audio interfaces—think Focusrite Scarlett or PreSonus Audiobox—offer enough inputs for multi-mic drum recording. Test each input for noise and record a simple reference take to confirm your gain settings before beginning a full session.
| Mic Type | Best For | Strengths | First Step To Try |
|---|---|---|---|
| Dynamic | Snare, toms | Rejects room noise | Place on snare, adjust angle for clarity |
| Condenser | Overheads, cymbals | Captures bright detail | Test in different corners of room |
| Ribbon | Room/mono | Warm, vintage tone | Point at kit center from 6 feet away |
| Boundary | Floor kick, room | Lively low end | Try on pillow inside kick drum shell |
| USB Mic | Quick setups | Straight to computer | Place overhead, test mono balance |
Tuning and Damping Prevents Mix-Time Frustration from the Start
Well-tuned drums make every microphone sound better, while poor tuning leads to headaches during editing and mix. Spending fifteen minutes with a drum key often gives more improvement than expensive gear swaps.
Damping reduces unwanted overtones and excess resonance. Even pro studios use homemade solutions like towels, gels, or felt to shape drum tone before reaching for EQ or plugins.
Quick Damping Fixes
Moongel or painter’s tape instantly tames ringy snares and toms. For kick drum boom, place a folded towel inside the shell so it just touches both heads. Listen critically—over-damping makes your kit dull, while under-damping leaves it wild and hard to blend.
- Stick a small roll of duct tape on toms to soften ringing—move closer to the edge for subtle effect, toward the center for stronger deadening.
- Use a wallet on the snare for a classic dry 70s sound; it’s easy to lift off if you want more sustain mid-session.
- Place a light blanket over floor tom heads to control low-end rumble, especially in rooms with thin floors or plenty of echo.
- Layer felt under cymbals’ washers to mellow harsh tones—check after each take that nothing rattles or deadens cymbal sustain too much.
- Try kneeling lightly on the bass drum shell as you record a kick-only part; it quickly thickens tone without extra gear.
Confirm each drum sounds good on its own before adding mics. If one drum dominates, adjust tension first; EQ should be a last resort.
Realistic Home Example: “My snare won’t stop ringing!”
Place a moon gel the size of a quarter near the rim. Tap gently—it should sound present but not harsh. Repeat after each tuning change, since small adjustments shift resonances more than you might think.
- Try taping a folded paper napkin with painter’s tape just off-center. It’s a temporary fix you can fine-tune mid-session.
- Add a worn drumhead underneath as a mute. Stack and move it until you find a satisfyingly crisp snap.
- Alternate between softer and harder beaters if recording kick drum; the attack changes how much ring you need to control elsewhere.
- Don’t stack towels or tape if the room is already dead. Instead, lift rugs or open a window for natural fill.
- Check drumstick wear—frayed tips change tone more than some heads do. Replace or rotate your sticks before another take.
Damping isn’t about muting. It’s about focusing the tone so mixing feels more like balancing, not problem-solving.
Microphone Placement Tricks That Deliver Real Results
Optimizing mic position transforms the whole drum mix without time-consuming EQ later. The 80/20 rule applies: 20 percent of moves give you 80 percent of results. Small shifts, big changes.
Think of each mic as a camera. Height, angle, and direction determine what the listener hears, just as framing and focus dictate a photo’s emotional impact.
Phase-Check Step Sequence
Start with overheads: stand above the kit, clap, and walk to each mic position, listening through closed-back headphones. If a mic sounds thin or washed out compared to standing by the drums, adjust the angle or move an inch closer/farther.
Next, tap the snare—or have a friend do it—while recording. Sum the overhead mics to mono and compare: does the snare sound fat and punchy or hollow? Reverse one mic’s polarity if things go hollow, or re-position until the problem clears.
For kick mic, aim through the hole in the head about halfway between center and edge. If you hear too much pedal click or beater slap, angle the mic slightly downward or add a small pad between the mic and shell.
Tweaking Overheads for Cymbals and Balance
Set up spaced pair or XY overheads above the kit, about two drumstick lengths apart. Your goal is true stereo—the snare and kick should appear centered when you listen back.
Angle both mics toward the snare and ride cymbal for even capture. If crashes jump out too much, raise the mics by a few inches rather than using EQ or compression.
Blending overheads lower for dense mixes and higher for sparse arrangements helps avoid unwanted cymbal wash. Solo the overheads while muting other close mics to check for phase and balance at the start of every session.
Balancing Multi-Mic Setups Without Getting Lost in Levels
A great multi-mic drum recording starts with clear intent. Decide if you want a natural or punchy sound before you reach for faders, not during mixing. Planning saves hours of guesswork later.
Take the time to name tracks and label inputs. When you revisit mixes days or weeks later, identifying the “snare bottom” from “snare top” instantly streamlines editing and prevents confusion.
Simple Gain-Setting Checklist
Set all preamps to zero and record a quick drum take with your hardest hits. Increase each preamp’s gain separately, watching for peaks below -6 dBFS on your digital meters. This leaves headroom and keeps transients clean for punchy, non-distorted mixing.
Solo each track and listen for background hum, hissing, or radio interference. Eliminate noise sources—move cell phones away, unplug non-essential electronics, or swap cables if needed. Cleaner input means cleaner mixes every time.
Once gains are set, group tracks by drum type in your DAW: all toms together, both overheads, and so on. This organization helps you shape each section separately and prevents level-balance headaches later.
| Track | Peak Level | Noise Level | Label Example |
|---|---|---|---|
| Kick | -6 dBFS | Low | “Kick In” |
| Snare | -5 dBFS | Clean | “Snare Top” |
| Toms | -8 dBFS | None audible | “Tom 1, Tom 2” |
| OH L/R | -10 dBFS | Room reverb present | “OH Left, OH Right” |
| Room | -12 dBFS | Slight HVAC | “Room Mono” |
Editing and Sorting Drum Takes Keeps Creativity Flowing
Organizing your takes right after recording makes mixing less overwhelming and encourages creativity. Deleting extra chatter and marking best performances as you go saves you hours down the line.
Labeling great takes with specific notes—”verse tight,” “fills smooth”—lets you find the vibe you want later without confusion. Color-code folders or add comments inside your DAW for quick recall during editing sessions.
Section-by-Section Editing Process
Start by sorting takes into “keepers” and “maybes” folders. Listen once all the way through, marking spots where energy drops or mistakes occur. Don’t edit yet—just note the timing.
Edit in the quiet parts first, trimming ends of fills or ghost notes that trail off. If you find yourself getting stuck, move to a different section and return later; this prevents ear fatigue and keeps your decisions fresh.
Once you’re happy, save that version separately. Working backwards—starting at the end of a song and trimming toward the intro—sometimes reveals hidden flaws in transitions or fade-outs.
Mixing Drums for Clarity and Power on Modest Gear
Mixing is the step that reveals how effective your drum recording techniques actually are. The best mixes bring out the strengths of your performance without fighting against room sound or poor levels.
Balance kick, snare, and overheads before adding toms, hats, or room mics. Picture the drumkit like anchor points in a triangle—focusing on balance here brings clarity before resorting to compression or EQ.
Mini-Fader Balancing Method
Lower all drum faders to zero, then bring up kick and snare together until they feel solid under your vocal or guide track. Next, raise overheads just enough to add shimmer and width, referencing other professional tracks in headphones.
Move toms and room mics until fills sound natural, then add hi-hats last, barely audible at first. It’s like seasoning food—add just enough for flavor, but never overwhelm the core of the groove.
Finally, loop a busy section and tweak levels with your eyes closed, relying solely on your ears. Trust that your perception, not visual meters, will lead to the mix you want.
Final Thoughts: Consistent Improvement With Every Session
Keeping a consistent, repeatable drum recording workflow helps you grow with each session. Concrete changes—like adjusting mic placement, re-tuning, or labeling tracks—directly impact your next project.
Building habits around intentional tuning, mindful mic choices, and honest editing delivers progress that recording gear alone can’t match. Invest in skills and observation first, and expensive upgrades become bonuses, not band-aids.
Embrace recording as a learning process. Every take reveals something new about your technique and your sound. Use these drum recording techniques as a springboard for better drum tracks in every home studio session.