
Even a seasoned drummer knows that sweaty palms or bad habits can send a drumstick flying across the room. Nothing throws off a solid groove like losing your grip mid-song, making reliable drumstick grip techniques completely essential.
Understanding exactly why hands slip and which grips work helps every drummer, whether you’re at band practice or in a packed venue. Slipping is frustrating, but it’s totally preventable with the right adjustments.
Explore practical drumstick grip techniques that encourage comfort, consistency, and security. You’ll get specific rules, exercises, and troubleshooting steps you can try on your next session—no matter what style you play.
Creating Stability with Matched and Traditional Grip Choices
Choosing the right grip method sets up your foundation for stick control and prevents slipping. These proven grips balance comfort, power, and finesse for different drumming situations.
Matched grip—where both hands mirror each other—is widely used for rock, pop, and modern styles. Traditional grip, often seen in jazz or marching, uses a palm-up left hand. Each has unique security benefits and best practices.
Following Matched Grip Safety Rules
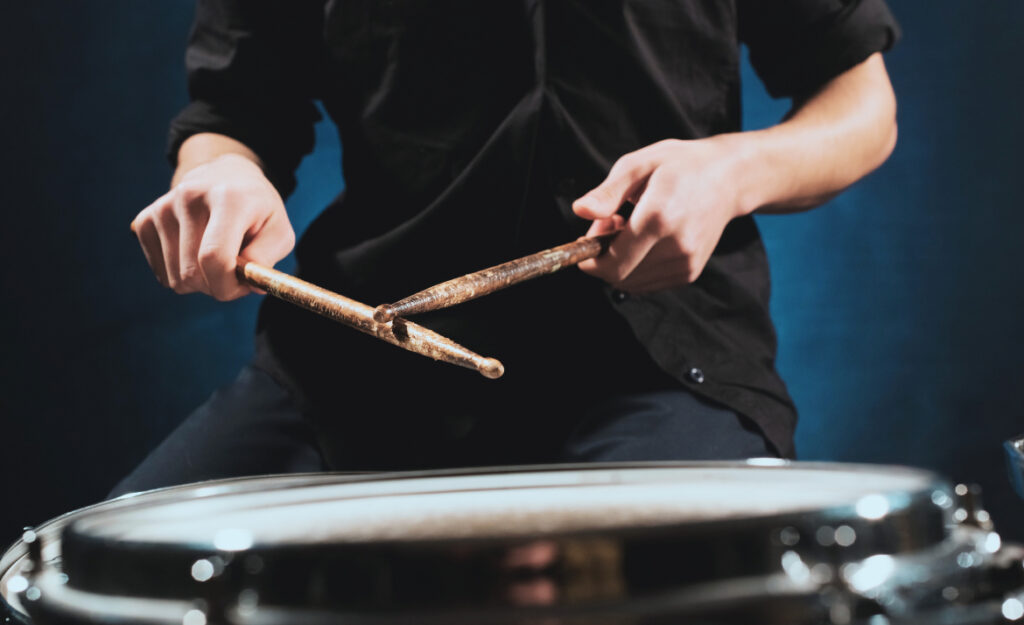
A matched grip works best when each finger gently cradles the stick. The thumb runs along the side, and the back three fingers help reinforce the grip. Avoid fist-tight tension to prevent quick fatigue.
With a properly aligned matched grip, the stick moves with your hand, not against it. This reduces shocks that jar your muscles or loosen your hold, making accidental drops much less likely even as you speed up.
For sweaty palms, try shifting the stick slightly forward in your fingers to maximize skin contact without squeezing. Many drummers swap in grip tape or wooden sticks for bonus traction and avoid slips in heated rehearsals.
Keeping Traditional Grip from Slipping
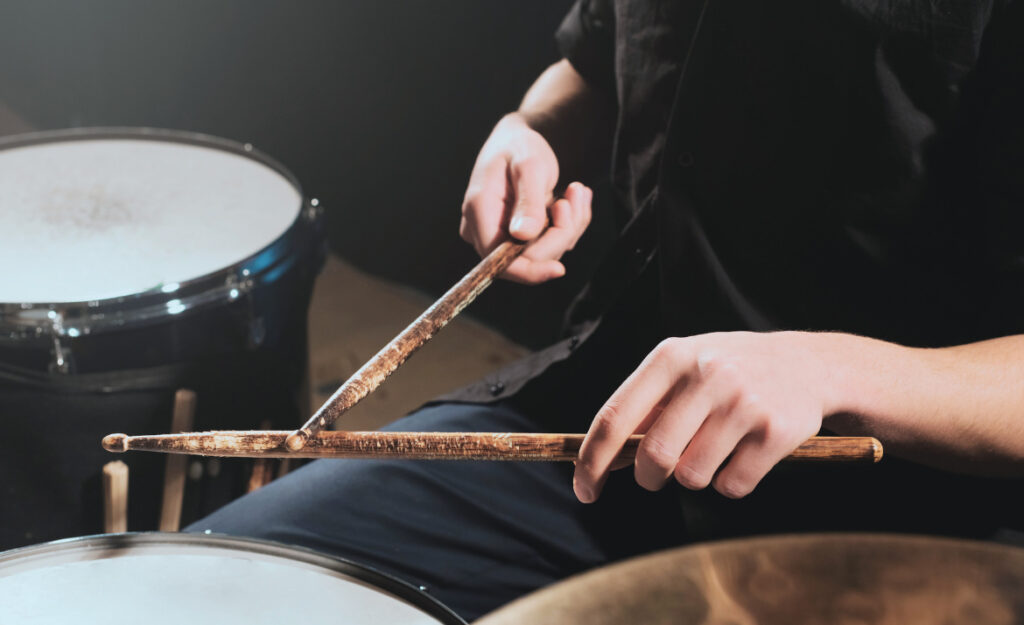
Traditional grip calls for a thumb-on-top right hand and a left hand holding the stick between thumb and index, supported by curled fingers. It’s excellent for touch-sensitive dynamics, but proper alignment is critical for preventing slips.
In the left hand, pivot the stick so it rests comfortably on the third finger, not the thumb pad, for both freedom and security. This anchor point prevents the stick from wiggling unexpectedly during rimshots or fast rolls.
If you notice sliding, double-check your fulcrum (the pinch point). A loose grip feels relaxed, but if the stick wiggles or pulls away after a rimshot, shift your hand slightly back and experiment again until it stays put.
Useful Grip Comparison Table
| Grip Type | Primary Use | Pros | Takeaway |
|---|---|---|---|
| Matched Grip | Rock, pop, marching | Even power, easy to learn | Try for most kits, swap as needed |
| Traditional Grip | Jazz, orchestral | Fine control, subtle accents | Best for nuanced playing |
| French Grip | Fast single strokes | Finger emphasis, light touch | Use for speed and finesse |
| German Grip | Heavy hitting | Stable, wrist focus | Great for loud passages |
| American Grip | Versatile genres | Hybrid, balanced feel | Good all-round choice |
Fine-Tuning Your Finger and Thumb Placement for Secure Play
Refining finger and thumb placement eliminates gaps and loose zones that lead to surprise slips. This section gives you step-by-step checks anyone can use in the practice room.
Start by reviewing your stick’s position in your hand. Too close to the tip reduces leverage and control, while too far back adds wobble and makes fast playing harder. Find your own “sweet spot.”
Optimizing Thumb Pressure and Flexibility
Your thumb anchors stability but shouldn’t clamp the stick flat. Keep it parallel to the stick and slightly bent. This lets the stick rebound and reduces friction, giving you smooth, slip-free motion even during quick passages.
- Press stick lightly between thumb and first finger for nimble control, allowing the rest of the hand to relax and move freely.
- Check thumb posture every five minutes of practice and reset if you feel tension or see the thumb pad whitening.
- Rotate the stick using just the thumb and index as a warmup drill. If the stick shifts awkwardly, adjust the angle for more comfort.
- Try taping the stick where your thumb meets the wood if you sweat excessively—this simple hack often adds enough friction for stable play.
- Shift your focus to consistency. A relaxed thumb lets your hand respond instantly to dynamic changes and prevents sudden slips during hard accents.
If you notice a growing gap between your thumb and the stick, pause and reset your grip. Subtle adjustments always beat forcing a tight hold.
Finger Placement: Closing the Gaps
Wrap your remaining fingers loosely but fully around the stick. Each finger should contact the wood, but not squeeze. Space in the grip means missed energy and increased risk of slipping—so fingertips should follow the stick as it moves.
- Let the pinky and ring finger complete the grip, especially in rapid fills or cymbal crashes, to keep the stick firmly in place.
- Too much finger tension slows you down. Practice letting go after each beat, then resetting the same finger lineup without looking.
- Fans of drumstick grip techniques say the secret is muscle memory: practice scales and syncopated exercises with close attention to your finger positions until you don’t need to think about it.
- Friction tape placed under the fingers can help gigging players maintain a steady hold in humid settings. Change it regularly for best results.
- After you settle into a comfortable grip, shake out your hands and replay that last measure. If the stick doesn’t move, you’ve nailed the setup.
Once set, finger placement will keep your grip secure through fast, complicated passages with less strain. Recheck your hand position every session.
Responding to Common Slipping Triggers during Play
Real-life scenarios, from high-energy solos to sweaty gigs, reveal exactly when and why sticks slip—even with good form. Identifying triggers lets you fix problems right as they happen onstage or in the studio.
Hand tension, moisture, and impact patterns combine to create unexpected stick ejections. Recognizing cues early—like a slight stick wiggle or sound change—helps you make the right adjustments quickly and avoid embarrassing mistakes.
Combating Moisture and Sweat while Drumming
Drum sessions can get hot, leading to sweaty hands that undermine even the best drumstick grip techniques. Bring an absorbent cloth and use it between songs for a quick wipe-down and extra grip confidence.
Some players keep a small open container of rosin by their kit; dipping their hands before a set adds needed tackiness. Make this part of your routine if slippery sticks are a recurring issue.
Add grip-enhancing stick wraps or choose sticks with built-in textured coatings—both quick fixes to prevent sliding, even in high-humidity environments or on long gig nights.
Reacting on the Spot: When the Stick Slides Mid-Performance
Picture a packed venue: your stick slips just as you launch into a drum fill. Instead of overgripping, subtly shift your wrist and fingers to the original grip zone and finish the phrase smoothly—audiences rarely notice quick, practiced adjustments.
Plan for recovery during rehearsals by setting a cue—”If my grip starts slipping, reset both hands on the next bar line.” This habit keeps your performance steady and your focus on the music, not the malfunction.
After a near-slip, take a breath and reaffirm your posture for the rest of the set. Consistency in correcting grip issues quickly boosts both confidence and steadiness under pressure.
Customizing Materials and Tools: Drumsticks, Grips, and Accessories
Swapping out drumsticks or adding grip aids transforms your hold and reduces slips. Choosing the right combinations can make a critical difference mid-song or during a marathon session.
Pick drumsticks that match your hand size and playing style. Lighter sticks with thicker handles offer better control for those with smaller hands, while specialty grip tape serves as a low-cost, high-reward improvement.
Comparing Drumstick Materials for Best Grip
Wood sticks (like hickory or maple) give a natural, tactile feel and absorb sweat fairly well. Nylon tips can feel more slippery on coated heads, so keep towels handy. Experiment with both to find your best match for traction and tone.
Synthetic or rubber-coated sticks offer maximum friction and are ideal for hard-hitting or outdoor gigs. Many percussionists with grip issues rely on these for high-pressure performances, since they don’t absorb moisture the same way wood does.
Some players rotate between different sticks based on gig conditions—for instance, switching to rubber-coated sticks during summer festivals, then using regular wooden sticks in the studio. Flexible stick selection helps prevent grip surprises.
Exploring Add-On Grip Solutions
Grip tape, sticky wax, and O-ring grips are quick-fix tools to keep your hands from losing traction on the stick. Each adds a bit of personalized security you can adjust or swap as conditions change.
Grip tape wraps the stick, increasing both comfort and roughness. Wax adds a tacky feel—just a light touch is usually enough. O-ring grips build up thickness where your fingers sit and also serve as a tactile anchor point.
If you tour or play multiple venues, try a kit with each of these options. You’ll quickly discover what works best for the season, your sweat level, and even your band’s setlist.
Building Strength and Endurance for Consistent Grip Control
Stronger hands and wrists cushion against slips during demanding passages or long gigs. Regular exercises not only prevent fatigue but also make even subtle grip adjustments second nature over time.
Daily stretching, targeted strength drills, and technical routines build up your endurance, so your hands won’t lose their security after complicated fills or two-hour sets. Each exercise supports the muscle memory essential for the best drumstick grip techniques.
Finger and Wrist Strengthening Circuit
Squeeze a small hand grip exerciser for 30 seconds at a time to develop forearm stamina. After that, roll your wrists with a light stick, rotating clockwise and counterclockwise for a minute. This combination increases your resilience against slippage and fatigue.
Transition into finger independence drills by tapping each finger on a table, mimicking your ideal stick placement, then swapping hands after every 30 taps. These micro-movements build speed and dexterity for real playing scenarios.
Practice slow, exaggerated stick twirls between the thumb and index. The more control you have over isolated movements, the less likely sweat or impact will break your grip unexpectedly mid-song.
Micro-Exercises for On-the-Spot Recovery
Keep stress-relief putty or a tennis ball in your stick bag. During breaks in rehearsal, squeeze it for short bursts to relax muscles and boost blood flow. Quick routines like these refresh grip stability mid-set.
Incorporate the “soft touch challenge”: tap your snare using only your back fingers for a full verse. Switch to traditional grip, then match the same challenge. Adjust your finger spread until the stick never wiggles, even when relaxed.
Integrating grip recovery drills into your warmup keeps your playing fluid and stops muscle tension from causing slippage. This habit will carry over into live settings and reduce surprise drops.
Adapting Grip Techniques for Different Drumming Styles
Different genres demand specialized grip approaches. Adapting drumstick grip techniques to the requirements of each style ensures you avoid slipping while maximizing comfort and performance clarity.
Rock drummers rely on tight control for loud playing, whereas jazz demands subtlety and nuance. Tailor your grip to the needs of the music and the venue for reliable results every time.
Switching Grips Seamlessly Between Songs
In a cover band gig, you might start with matched grip for a powerful rock set, then shift to traditional grip for a jazz ballad. Before each song, take five seconds to reform your grip—don’t rely on muscle memory alone for every transition.
During quick set changes, it’s okay to consciously exaggerate finger placement or check your thumb position. These cues keep you centered and help your muscles “reset” for the upcoming song style, reducing the risk of slips.
Make notes in your setlist: “Check grip after bar 8,” or “Switch sticks after Song 3.” This systematic approach guarantees stability, especially during high-stakes shows.
Developing a “Feel” for Each Genre
Dynamic, fast jazz licks require a lighter, more responsive grip, letting your fingers do more work. Practice alternating between gentle and firm hand positions, focusing on what feels most secure for each swing.
Rock and metal demand a firmer, wrist-focused approach—try practicing power strokes while maintaining just enough tension to keep the stick from slipping out. This straddles the line between security and speed.
Funk, pop, and R&B usually benefit from hybrid or American grip: adjust finger spread for quick syncopated hits. Experiment with the amount of stick pointing past your palm; more stick behind your hand can help both grip and sound.
Closing Advice: Locking Down Your Personal Grip Approach
Consistency in grip is the drumming secret that keeps your sticks from slipping in even the toughest situations. Each adjustment, drill, and material choice adds to your personal playbook for comfortable, confident performances.
Whether you sweat onstage or trade genres regularly, refining drumstick grip techniques pays off in smoother execution and fewer unwanted drops. Periodic self-checks and practice tweaks are the habits that top drummers build into their routine.
Trust your feel, make adjustments, and don’t fear trying new grip materials or drills until you find your best fit. A reliable grip means your only focus will be laying down the groove—never chasing runaway sticks.