The difference between a smooth gig night and hours of tuning drama starts with simple care for your drum gear. Players who store drums properly spare themselves unwanted surprises and sounding off-key.
Drums react to every environment you put them in. Ignore basic care and warping or damage sneaks up, changing the sound you love. Our drums deserve respect on and off stage.
Let’s walk through the exact steps working drummers use to keep their kits solid, session after session. Explore these strategies to protect your investment and your best possible sound forever.

Choosing Safe Storage Spaces Shields Drum Integrity
Pinpointing the oroper space to store your drums means you avoid temperature swings, excess moisture, and the slow creep of warped shells. Start with a stable, interior location away from windows and HVAC drafts.
Walk your space, checking for leaks, windows that bake in sunlight, or damp basement corners. You want a spot with predictable, mild temperature and humidity that acts more like a closet than a garage.
Controlling Room Temperature Pays Off Every Season
Stable room temperature keeps drum shells from swelling or shrinking. Sudden chilly drafts or heat waves put pressure on natural woods—think of a bread loaf going stale after being left out.
Pick a space that stays between 60 to 75°F throughout the year. In practice rooms with wild swings, a small thermostat can help you monitor and adjust as needed for safety.
Set reminders to check temperature once a month. Consistency means each drum head stays tensioned, shells don’t crack, and hardware resists fatigue.
Managing Humidity: Dehumidifiers and Hygrometers
Humidity rates above 55% encourage warping and rust on lugs. Below 40%, drying out leads to fissures and clattering overtones. Use a simple hygrometer to check your space each week.
When humidity climbs, run a dehumidifier on low. For arid climates, try small room humidifiers to protect wrapped finishes. Placement should be a few feet away from the drums so airflow is gentle, not direct.
Monitor for condensation on metal parts or musty odors when you walk in. Address problems fast—a two-day spike can mean months of slow damage.
| Storage Site | Temperature Range | Humidity Control | Best Practice |
|---|---|---|---|
| Music Room Closet | 60–75°F | Use dehumidifier | Consistent, shielded from sunlight |
| Garage (Uninsulated) | 30–100°F | None | Avoid: uncontrolled swings cause warping |
| Basement Corner | 50–70°F | Dehumidify | Inspect for leaks every month |
| Attic | Varies widely | None | Avoid: heat and dryness crack shells |
| Under Bed | Room temperature | Check for airflow | Works for short-term if bagged and elevated |
Creating Drum-Friendly Environments: What to Do and What to Avoid
Setting up the right environment goes beyond just picking a nice room. The conditions inside that room make or break your investment when you store drums properly.
Gentle airflow, away from vents or heating elements, keeps pads from warping and prevents buildup of dust in small crevices or on head surfaces.

Travel Care Tips for Drummers: Protect Your Drum Kit Everywhere
Drummers—keep your gear safe with road-tested travel care tips!Optimal Room Setup for Drum Safety
Block direct sunlight by using blackout curtains on nearby windows. Sunlight bleaches finishes and accelerates brittle wood splits.
- Install blackout panels: Protect drum finish and shell glue from constant sun exposure by sliding in blackout panels or heavy curtains, ensuring panels overlap edges.
- Arrange drums off exterior walls: Keep 6 inches minimum from walls to allow for air circulation, so humidity pockets don’t trap against the shells.
- Use soft rugs or drum mats: Place a drum-specific mat under the entire kit. Mats minimize vibrations and insulate from cold floors, reducing shell stress.
- Elevate drums with stands or low pallets: Lifting drums 2–4 inches above ground prevents moisture transfer and molds from forming under bottom edges.
- Ventilate gently: Open doors for short periods daily for fresh air, but avoid placing the kit near an AC vent or heater blower.
Implement these steps sequentially next time you reposition your kit, checking off as you adapt each element to your particular space and climate.
Poor Storage Habits and What to Fix
Let’s get honest about the habits that quietly ruin gear. Resting drums directly on hard concrete, forgetting to bag heads, or keeping your kit beside laundry areas risks both hardware and shell health.
- Stop stacking bare shells: Drums nested without padding lose roundness and risk scuff marks. Use soft cloths between shells when stacking tiered toms off the kit.
- Keep out of bathrooms/laundry: Steam and cycling moisture corrode sensitive tension rods and attract mold to lug holes.
- Don’t cover with plastic sheets: Plastic traps humidity and causes shell sweat; use breathable drum covers or cotton sheets instead.
- Avoid direct contact with floors: Drums left flat on vinyl or tile absorb vibrations and cold, causing glue joints to separate.
- Never lean drums upright for long storage: Lateral stress over even a month can warp hoops and stretch out heads far from their intended shape.
If you spot these errors in your routine, swap in one fix per week. You’ll notice heads hold tune longer and shell finishes look fresher over seasons.
Maintaining Drum Hardware: A Routine for Longevity
Cleaning and regular maintenance routines keep drums in tune and trouble-free between sessions. Dust, grime, and sweat can break down tension rods and lugs, affecting shells just as much as heads.
Store drums properly by including quick inspections in your weekly or monthly rhythms—to safeguard hardware for the long haul.
Caring for Hoops and Tension Rods
Before storing, wipe hoops and rods with a soft, dry cloth. If rods feel sticky when you loosen them, they’re due for a light application of white lithium grease—avoid WD-40, which attracts dust.
Check for bends or pitting as you turn each rod by hand. Spinning smoothly and seated evenly means safe long-term storage without ‘settling’ or warping parts.
If you spot surface rust, gently buff with a clean pink eraser or micro-abrasive pad. Replace rods once groves emerge; hardware fatigue means lost tuning stability.
Protecting Lugs and Mounts From Moisture
Lugs do more than attach heads—they anchor the drum’s sound. Wipe each clean with a microfiber cloth, paying extra attention to rubber gaskets where sweat collects during play.
For basement kits, dab a little silicone grease inside each lug housing after deep cleans. This forms a barrier against humidity and gives you an extra edge for tuning ease next session.
If you store your drums into cases for months, loosen all rods by a quarter turn. This relieves tension and keeps heads springy when gig night returns.
Using Protective Cases and Bags: Smart Choices for Storage
Rugged cases aren’t just for travel—they’re essential even in home studios. Storing drums properly in quality cases prevents stray bumps, airborne debris, and accidental tip-overs from damaging shells and finishes.
Select soft, fleece-lined bags for practice room gear and hard, molded cases for longer storage. Both types block dust and act as a cushion against vibrations from nearby gear.
Case Selection: Hard, Soft, and Hybrid Explained
Hard cases shield drums from sharp blows, like falling cymbal stands in band storage rooms. Look for cases with thick foam linings—avoid bare plastic insides that can scuff shells over time.
Soft bags shine in personal or low-move environments. Their padding protects finish, and breathable fabrics regulate moisture, reducing the risk of trapped humidity on lacquered shells.
Hybrid cases combine the impact resistance of hard shells with moisture-wicking linings. They suit gigging players who stash kits at venues or in truck beds overnight, balancing robust protection and interior climate control.
| Case Type | Best Use Scenario | Resistance to Impact | Takeaway |
|---|---|---|---|
| Hard Plastic Molded | Tours, shared storage | High | Choose for maximum security |
| Foam-Lined Bag | Daily personal use | Low–Medium | Ideal for quick access |
| Hybrid Shell Bag | Frequent gigging | Medium–High | Balances protection and ventilation |
| Canvas Sleeve | Short-term home storage | Low | Protects from dust but not bumps |
| No Case | Rarely recommended | None | Vulnerable to scratches, dents, and dust |
Preparing Drums for Long-Term Storage: The Step-By-Step Checklist
Before you set drums aside for weeks or months, follow a checklist to ensure no step gets skipped when you store drums properly. Preparation beats fixing damage later.
Remove heads and wipes shells with a lint-free cloth to eliminate fingerprints and dust before storing. Loosen all tension rods evenly, and if humidity is high, add silica gel packs to the case.
Step-by-Step Checklist for Drummers
- Clean all surfaces: Use a dry microfiber or lint-free cloth on shells, heads, and hoops to prevent sticky buildup during downtime.
- Loosen tuning evenly: Back off each tension rod a quarter to half turn, keeping hoop pressure consistent across the head for balanced stress release.
- Disassemble hardware: Remove tom mounts, snare wires, and pedals for separate storage, letting tension springs relax and avoiding accidental damage.
- Protect heads with paper sheets: Place clean, acid-free paper between head and shell for scratch protection if stacked. Never use colored pages.
- Add moisture absorbers: Slip a silica gel pack or desiccant pouch in each drum for longer storage sessions. Replace every season for best results.
Complete each task methodically, crossing off the checklist to guarantee you’ll store your drums properly and keep them damage-free in any season or location.
Transporting and Storing Drums Between Venues Without Sacrificing Shape
Shifting your drum kit between rehearsal spaces, venues, or storage lockers can stretch mounting points and warp shells if rushed. Treat each move as a miniature setup session.
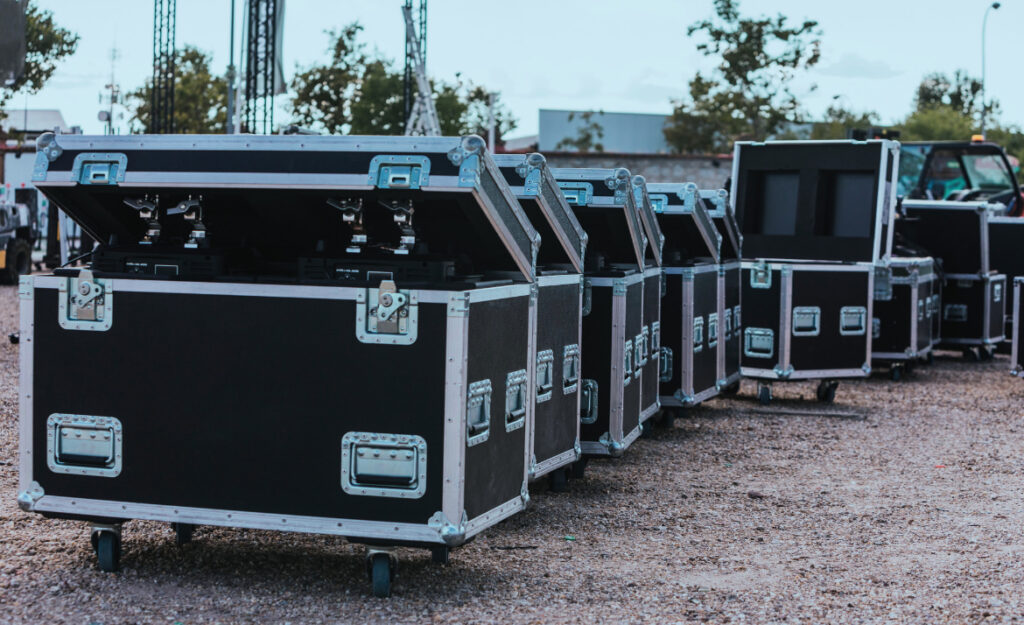
Secure each drum in its own case, padding the interior to stop sliding in transit. Position hardware bags and cymbal sleeves so nothing presses against fragile edges during jostles.

Kit-Ready Transport: A Moving Day Script
Picture the scene: You’re packing after a late gig, sweat on your brow, and a bandmate asks if they can just ‘toss your floor tom on top.’ Politely insist—‘Let’s case everything individually so nothing shifts on the drive home.’
Drums travel better upright, fitted snug in cases without crowding. Heavier items go low in the vehicle, and nothing rests atop cases with heads facing up to prevent flattening or rim dents.
Practice this script each loadout: ‘I’ll handle the drums; please set them upright in the van, nothing on top or pressing against the sides.’ You’ll protect hardware and keep tuning smoother gig after gig.
Venue Storage: Managing Quick Guitar-Dominated Spaces
Arriving at a rehearsal space littered with amps and cables, scope a wall corner clear of gear movement. Set up using rugs or folded towels under each drum to insulate from floor vibrations.
Ask venue staff if the HVAC kicks on overnight or if cleaning crews move gear. Position your kit out of foot traffic and avoid heater vents, protecting both the sound and longevity.
Copy this word-for-word when stashing gear away: ‘Where’s the quietest, draft-free spot? I’ll keep my set clear of the walkway so it’s safe till next time.’ Ease and safety first.
Summary: Protecting Drums Is About Consistency
Consistent care is what keeps drums from warping, cracking, or losing their signature sound. Every step described here builds habits that protect your gear both day-to-day and during longer storage spells.
You can properly store your drums, and it isn’t about fancy gear—it’s a repeatable process using clean environments, routine checks, and attention to small details. Each approach outlined fits any budget or experience level.
Building these practices into your drumming life rewards you with an instrument that lasts, holds tune, and sounds its best wherever you take it.


